Finally the temperatures are warming up! Add that to the fact that I’m heading to the Metchosin International Summer School of the Arts (MISSA) to teach a plein painting workshop next week, and you have me outside painting. Yesterday, even though I’d planned to paint by the sea, it was sooooo windy that I thought, NOT a good idea. So instead, I chose backyard plein air painting.
It’s easy to forget what a painting treasure trove we have in the backyard. Cam and I have a tiny yard on two sides of our house yet there are pockets of light and dark, groupings of colourful flowers, and many textured greens. Here too I’m protected from much of the wind blowing through. So I set up for backyard plein air painting rather than venturing far afield.
Cam and I had both commented on the delicious beauty of a surprise stalk of hollyhocks. As I contemplated backyard plein air painting, I thought of them. So I had a look to see if they’d fit the painting bill. And yes! there was a lovely pattern of light and shade very easily divided into three values. Since I only had an hour and thought it wise not to complicate things too much, the hollyhocks were a wonderful subject.
Let me take you through the painting progression.
Here’s a photo of the hollyhocks and my easel set up in the backyard.

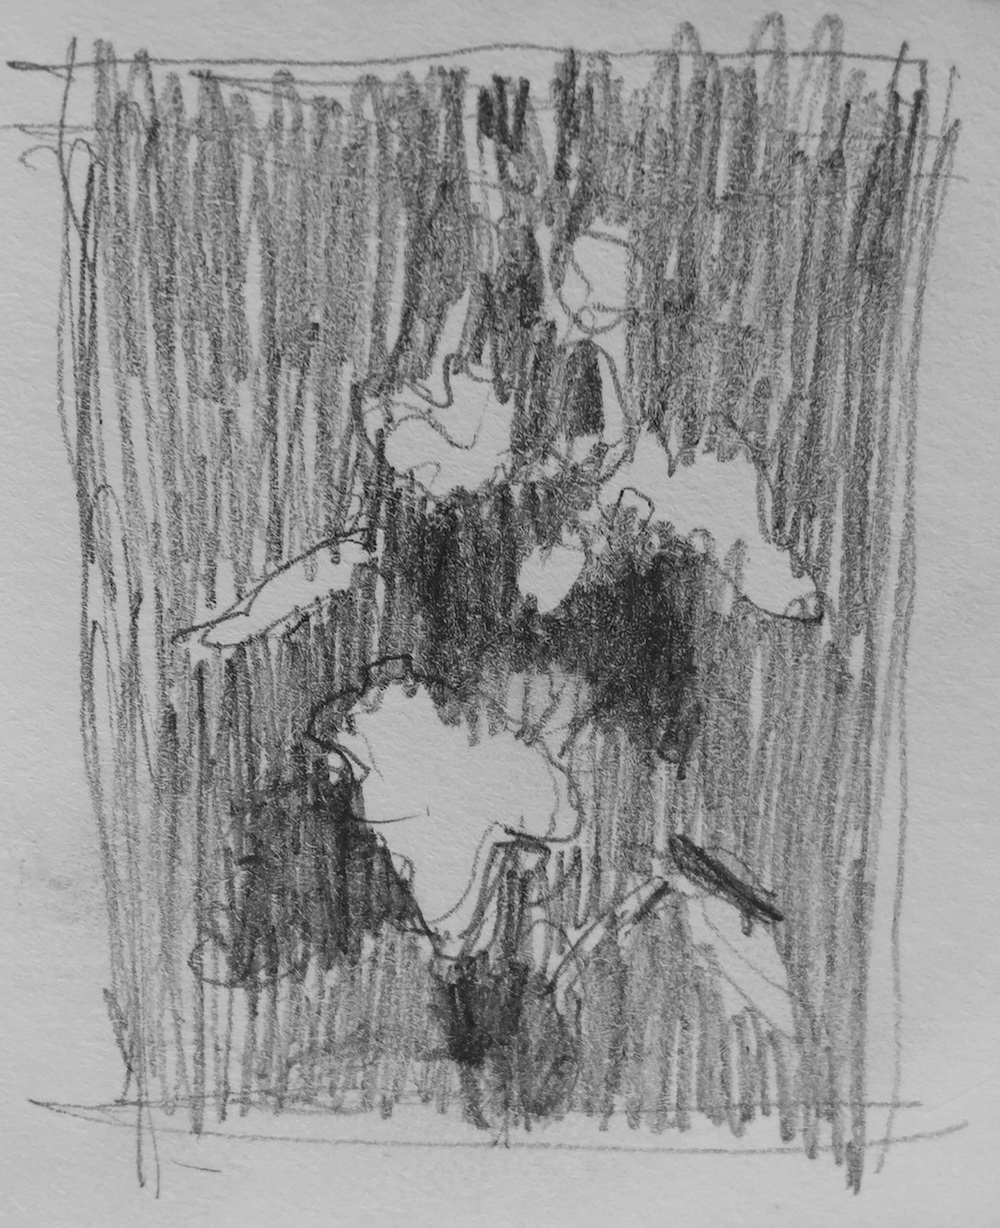
First, of course, I did a thumbnail:
Then I drew up the subject on UART 400 paper with vine charcoal:

Next, I chose underpainting colours for my three values. The leaves are the lightest and although bright green, they also reflect the blue of the sky so I chose blue. For the middle value, the background, I could sense some warmth in the grey behind so I chose a middle-value ochre colour. And finally, for the darks (which is seen both in the flowers and some of the leaves), I chose a red-violet.
Notice that I added a light leaf in the lower left (not seen in my thumbnail). I decided to add it and see how I felt about it in terms of the composition. At this stage I can easily get rid of it if it doesn’t work.
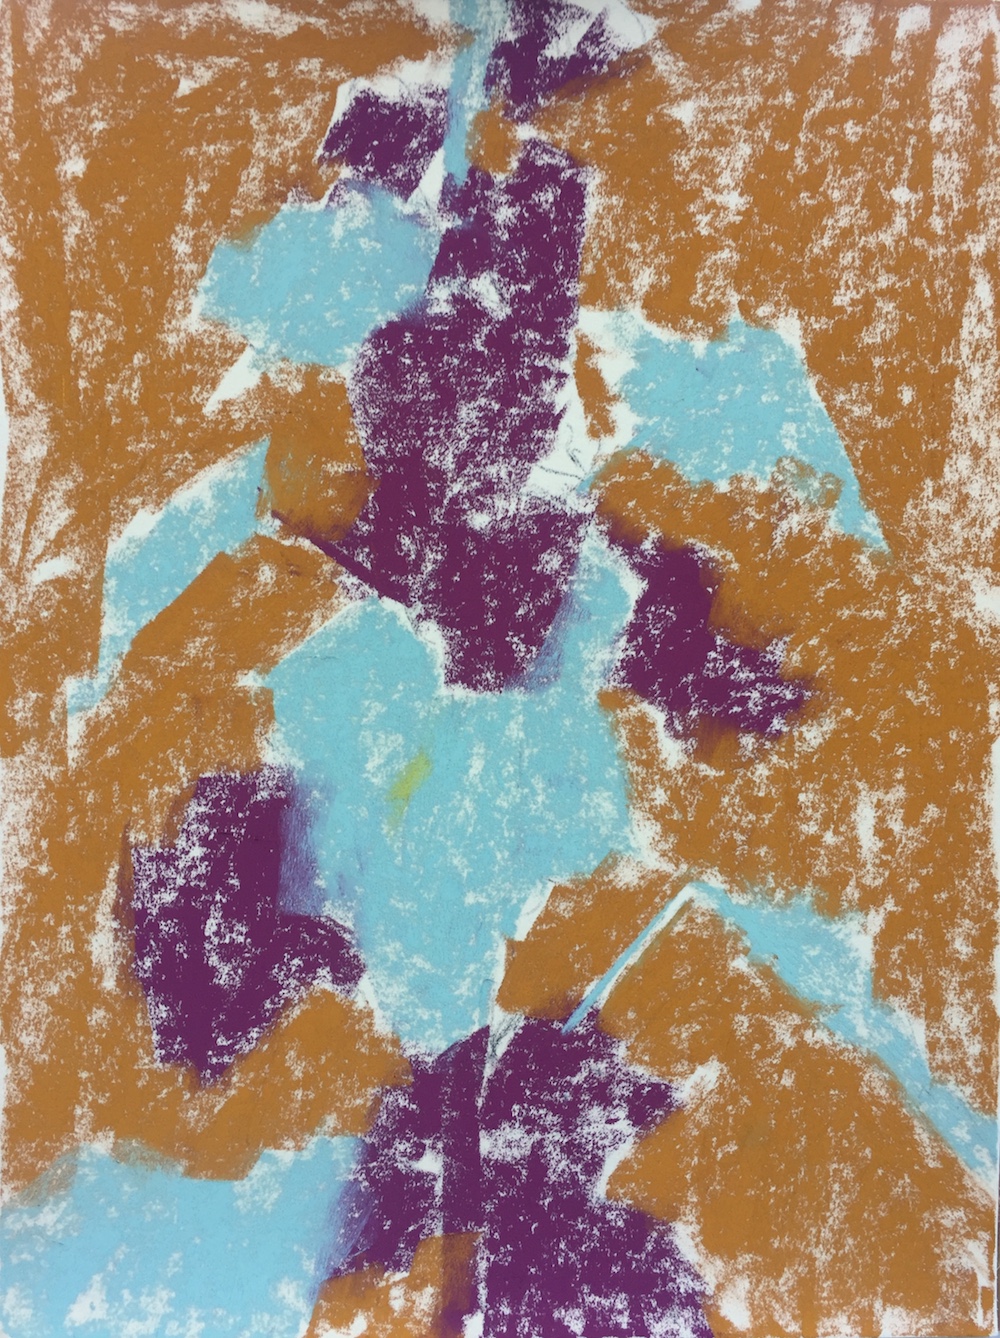
I then started adding another layer, this time, looking to the local colour and the colours I could see. You can see I’m still working with big shapes.

I began to observe and shape the hollyhock flowers by both painting the petals themselves and also cutting the petal shapes out by defining the space around them (the negative shapes).
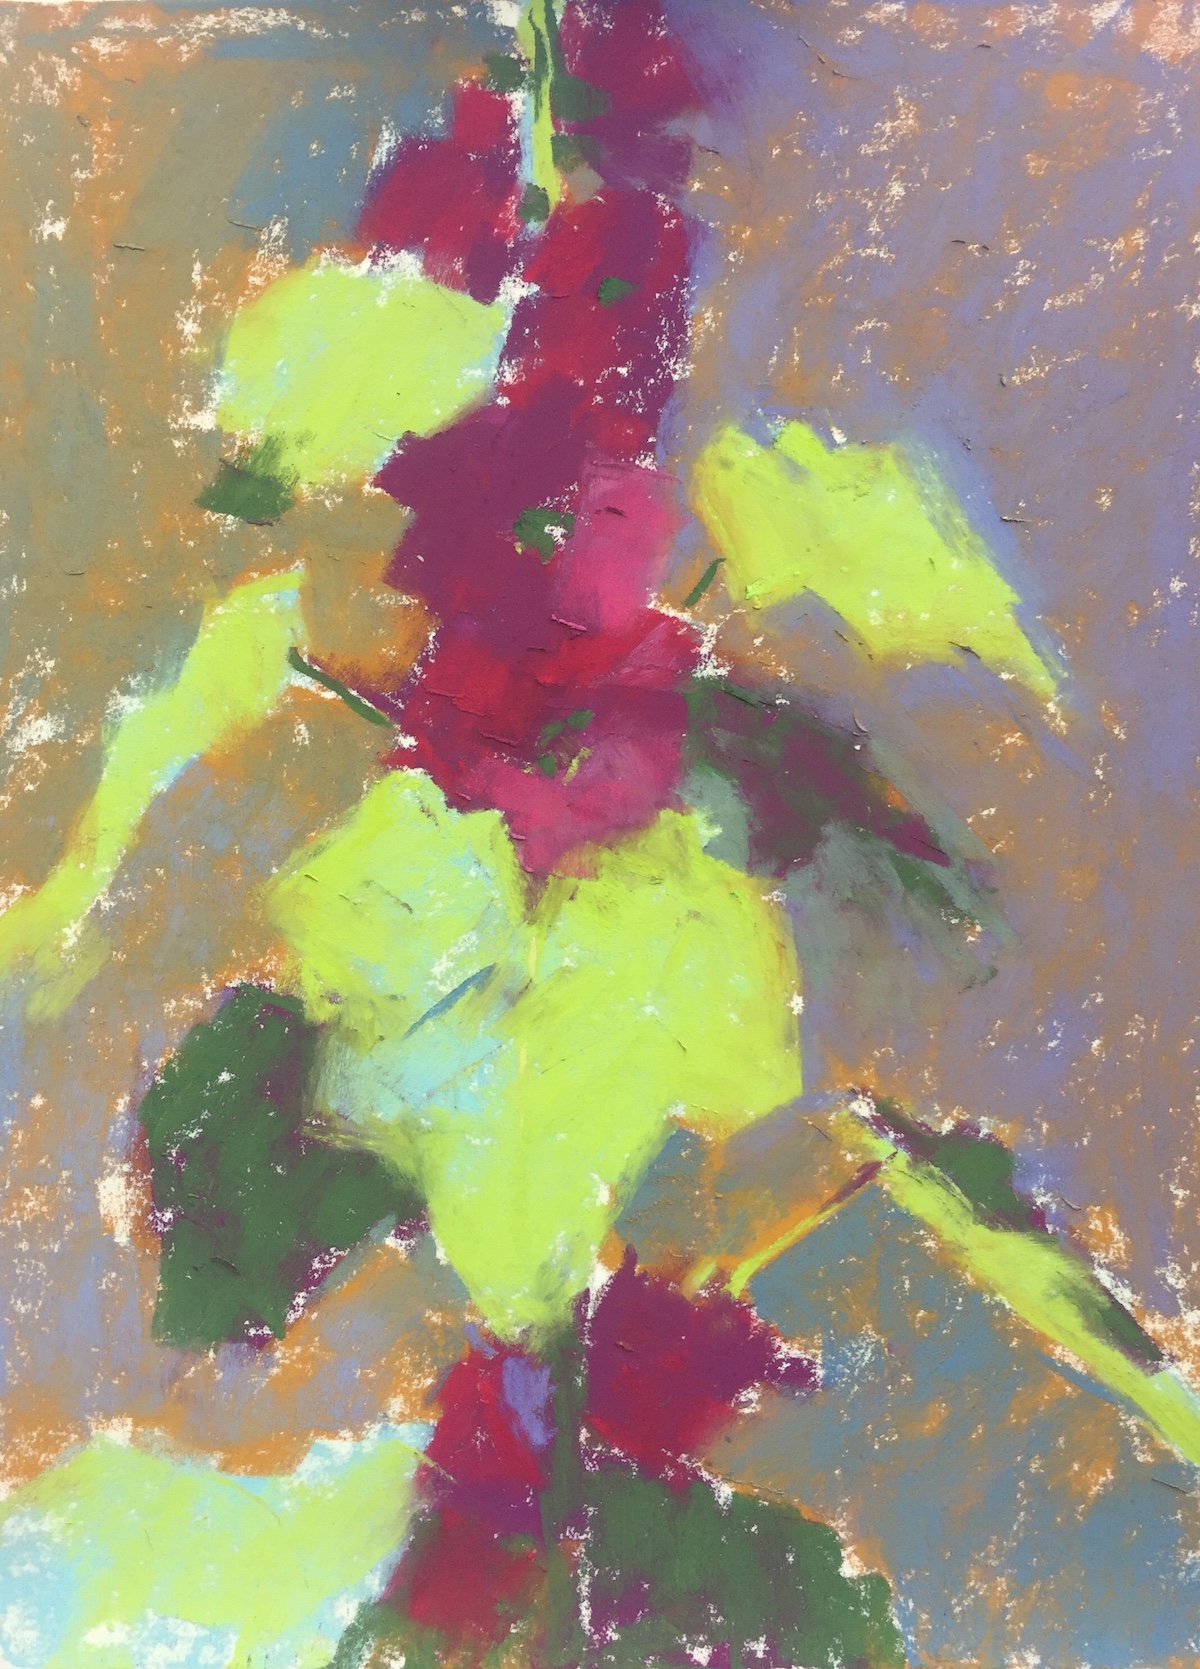
Then it was time to shape the leaves more carefully. As I did while working on the flowers, I painted both the subject (the leaves) and the space around them (the negative shapes).
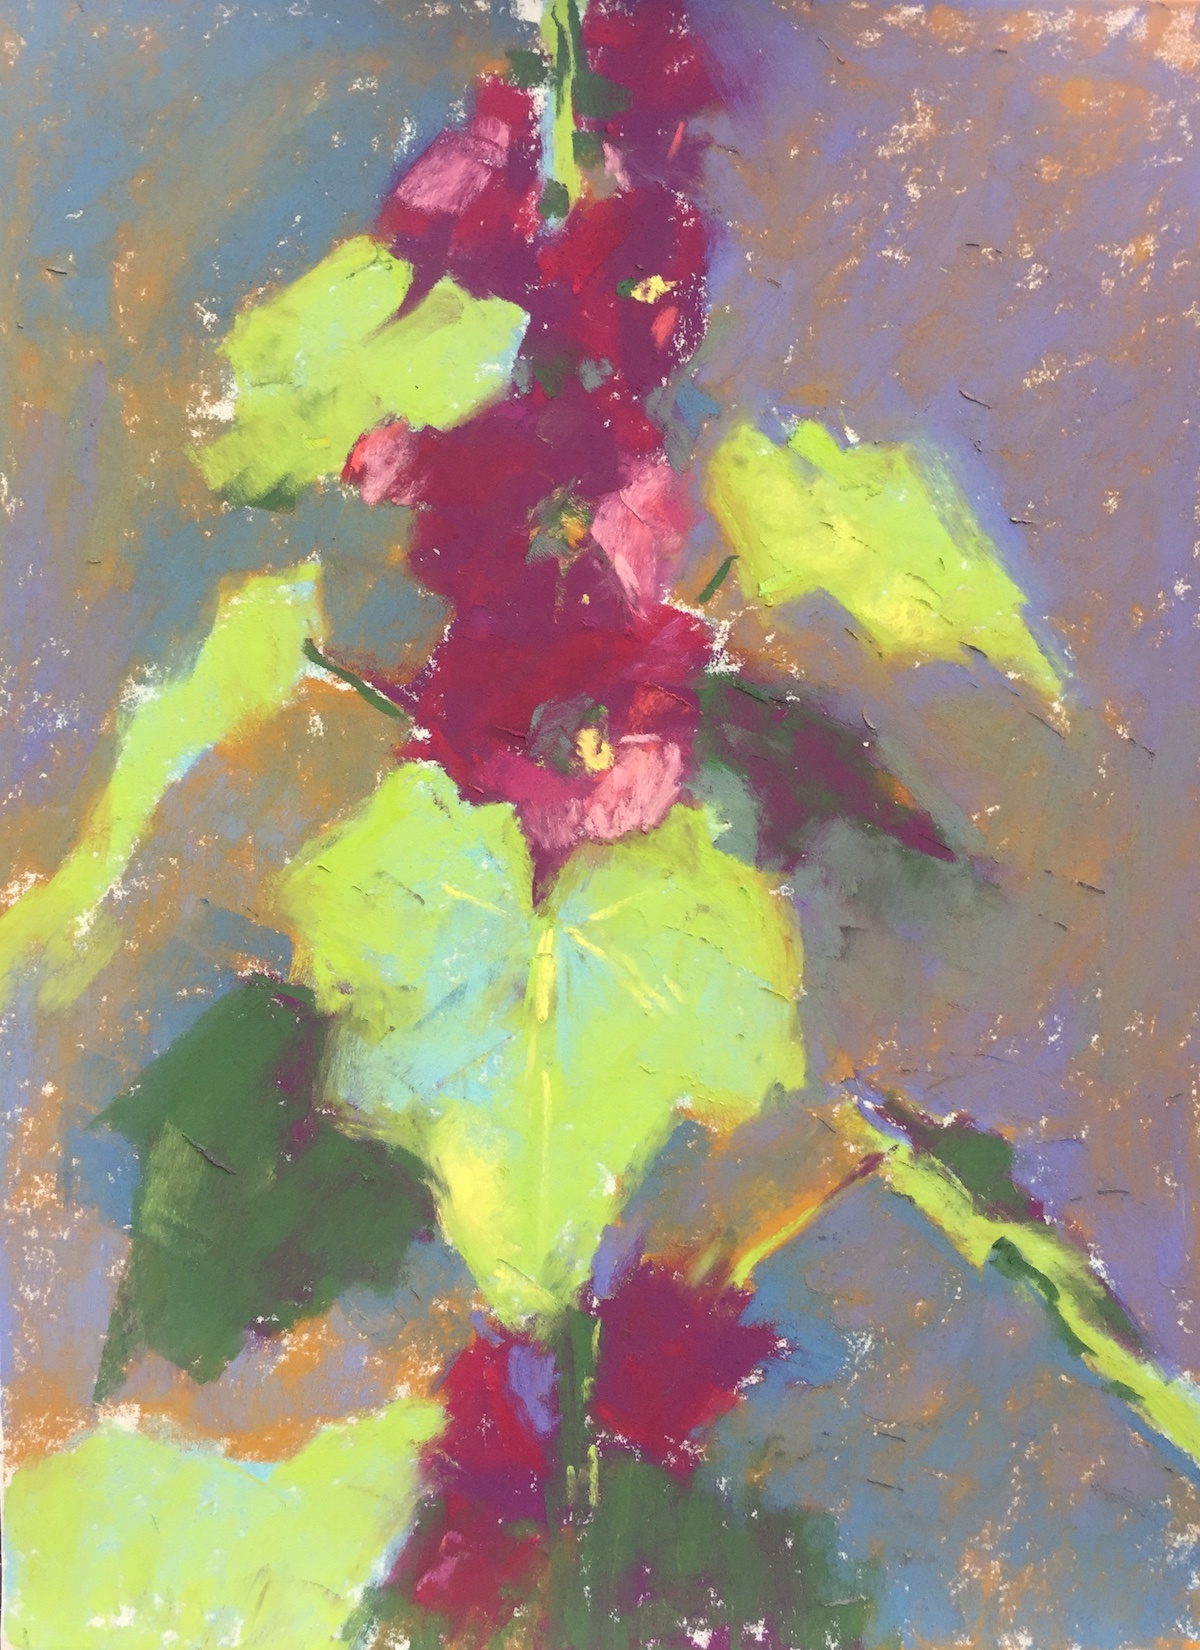
Now I needed to work more into the background. I had been painting the negative shapes around the flowers and leaves and now it was time to integrate all of those parts into a whole. I also added more colours including the pink colour from the flowers and the lighter blue used as the original light value colour.
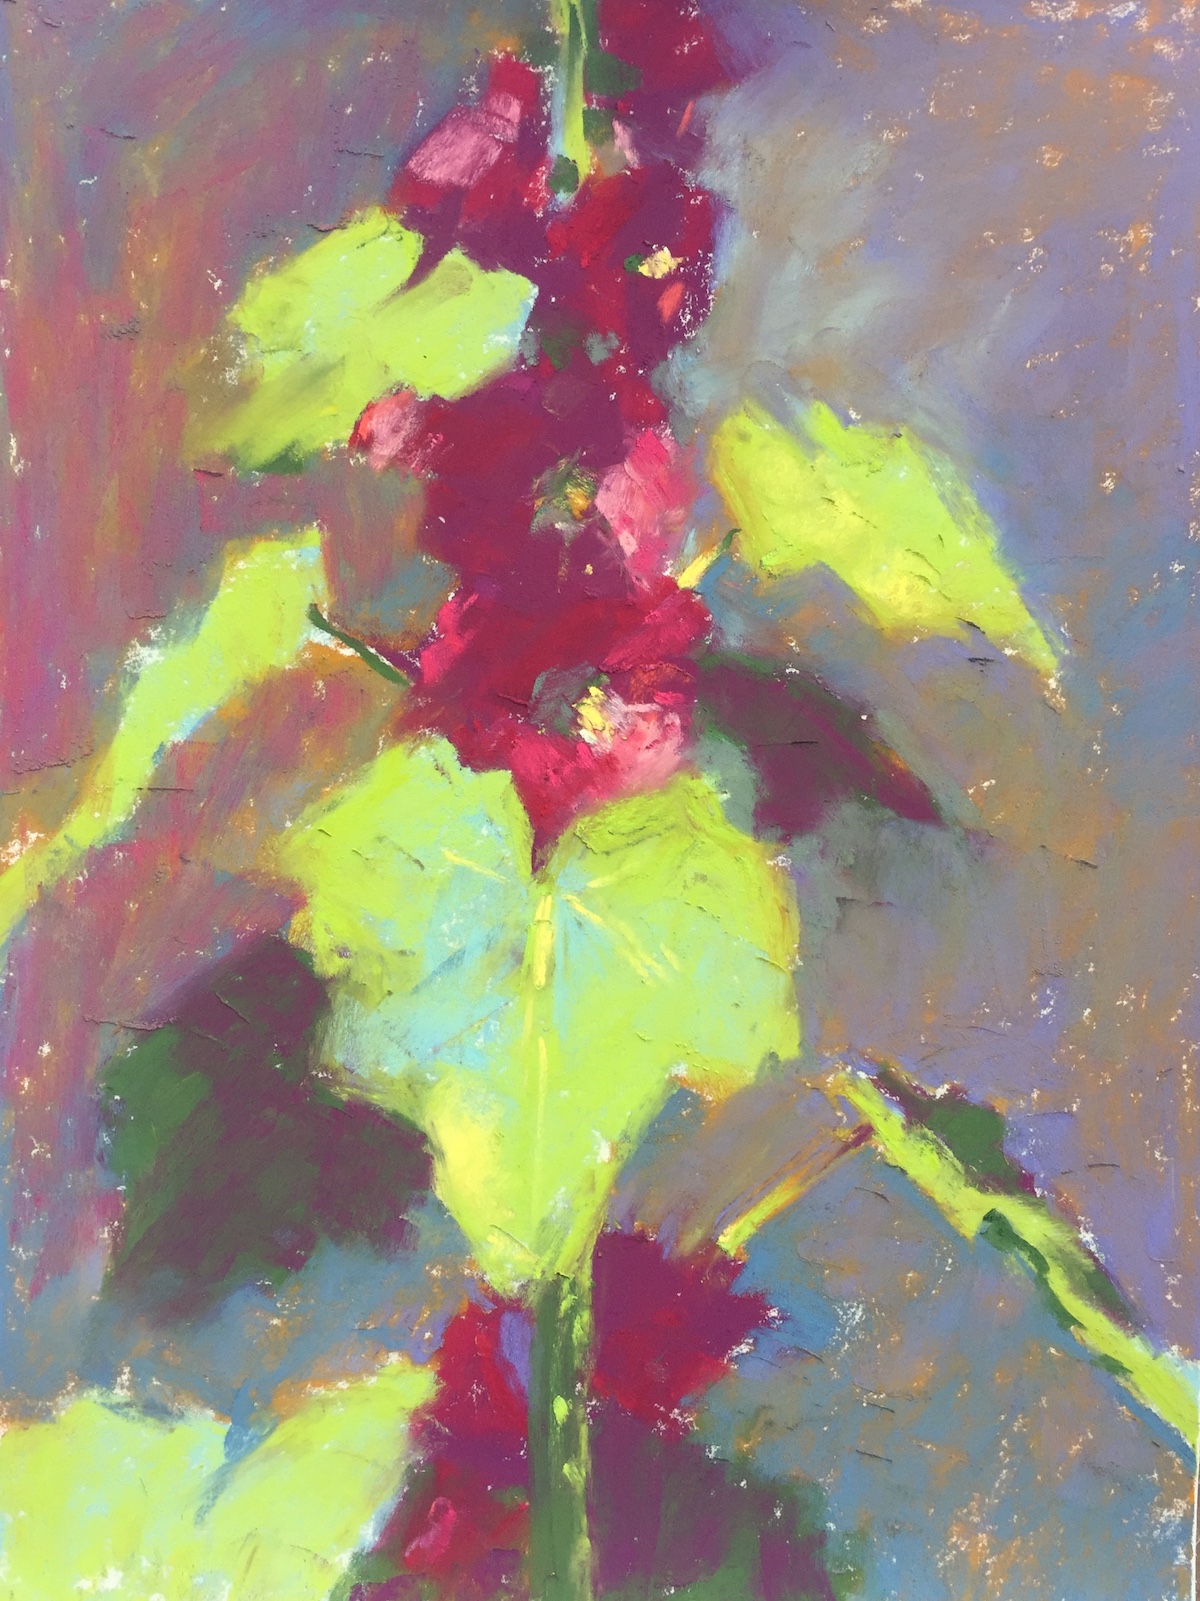
I worked a bit more on the piece (can you see how I changed one of the background leaves for instance?) but I was losing energy. AND I needed to stop and get going to my dance class!

This morning I had another look at the painting but this time with a mat around it. Using a mat helps to show the piece more clearly as it’s cut off from its surroundings. I could see a few things I wanted to change or enhance.

The angle and shape of the front leaf was bugging me so I adjusted that. I also clarified a few of the flowers (the delineation of light and dark patterns for instance). I added some highlights and also adjusted the background a bit more. And then I left it alone.
A plein air painting is an impression of how you’re reacting to the place you’re painting. When you tweak a plein air painting back in the studio, be careful you don’t lose the spontaneity of your reaction in the moment. The tendency is to want to smooth out all the bumps, to perfect all the things that are out of place. But doing so can dampen the energy of the work done on site. So be tentative in your fixings.

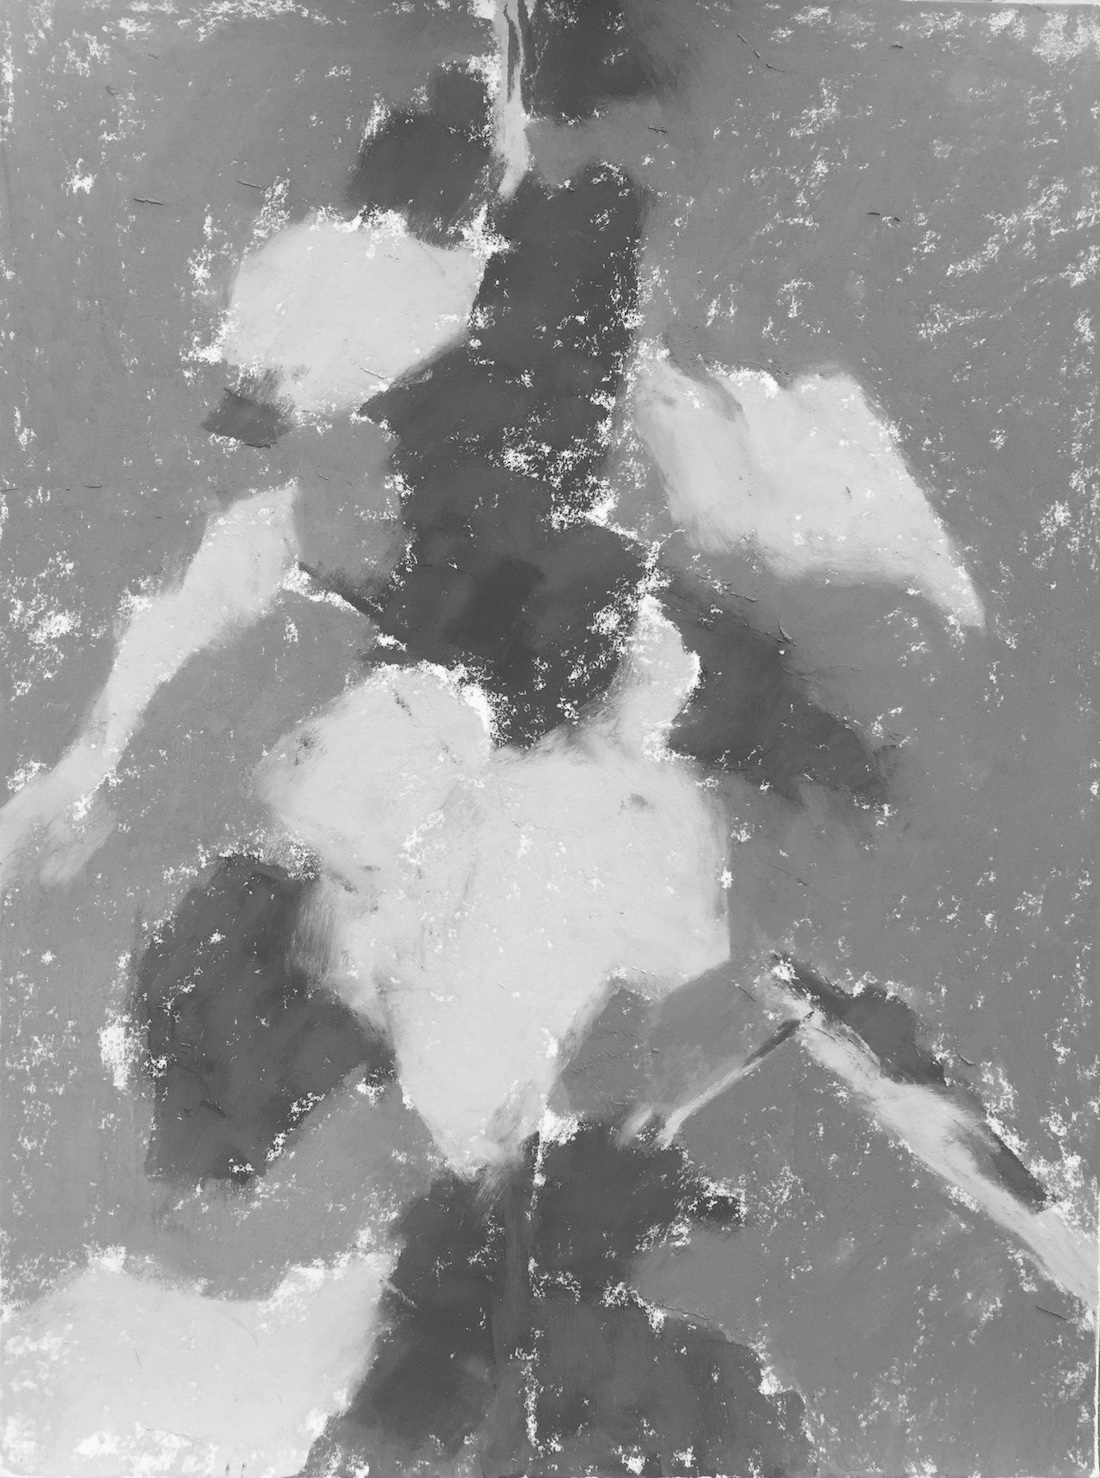
And let’s have a look at it in black and white to see how the value structure is holding up:

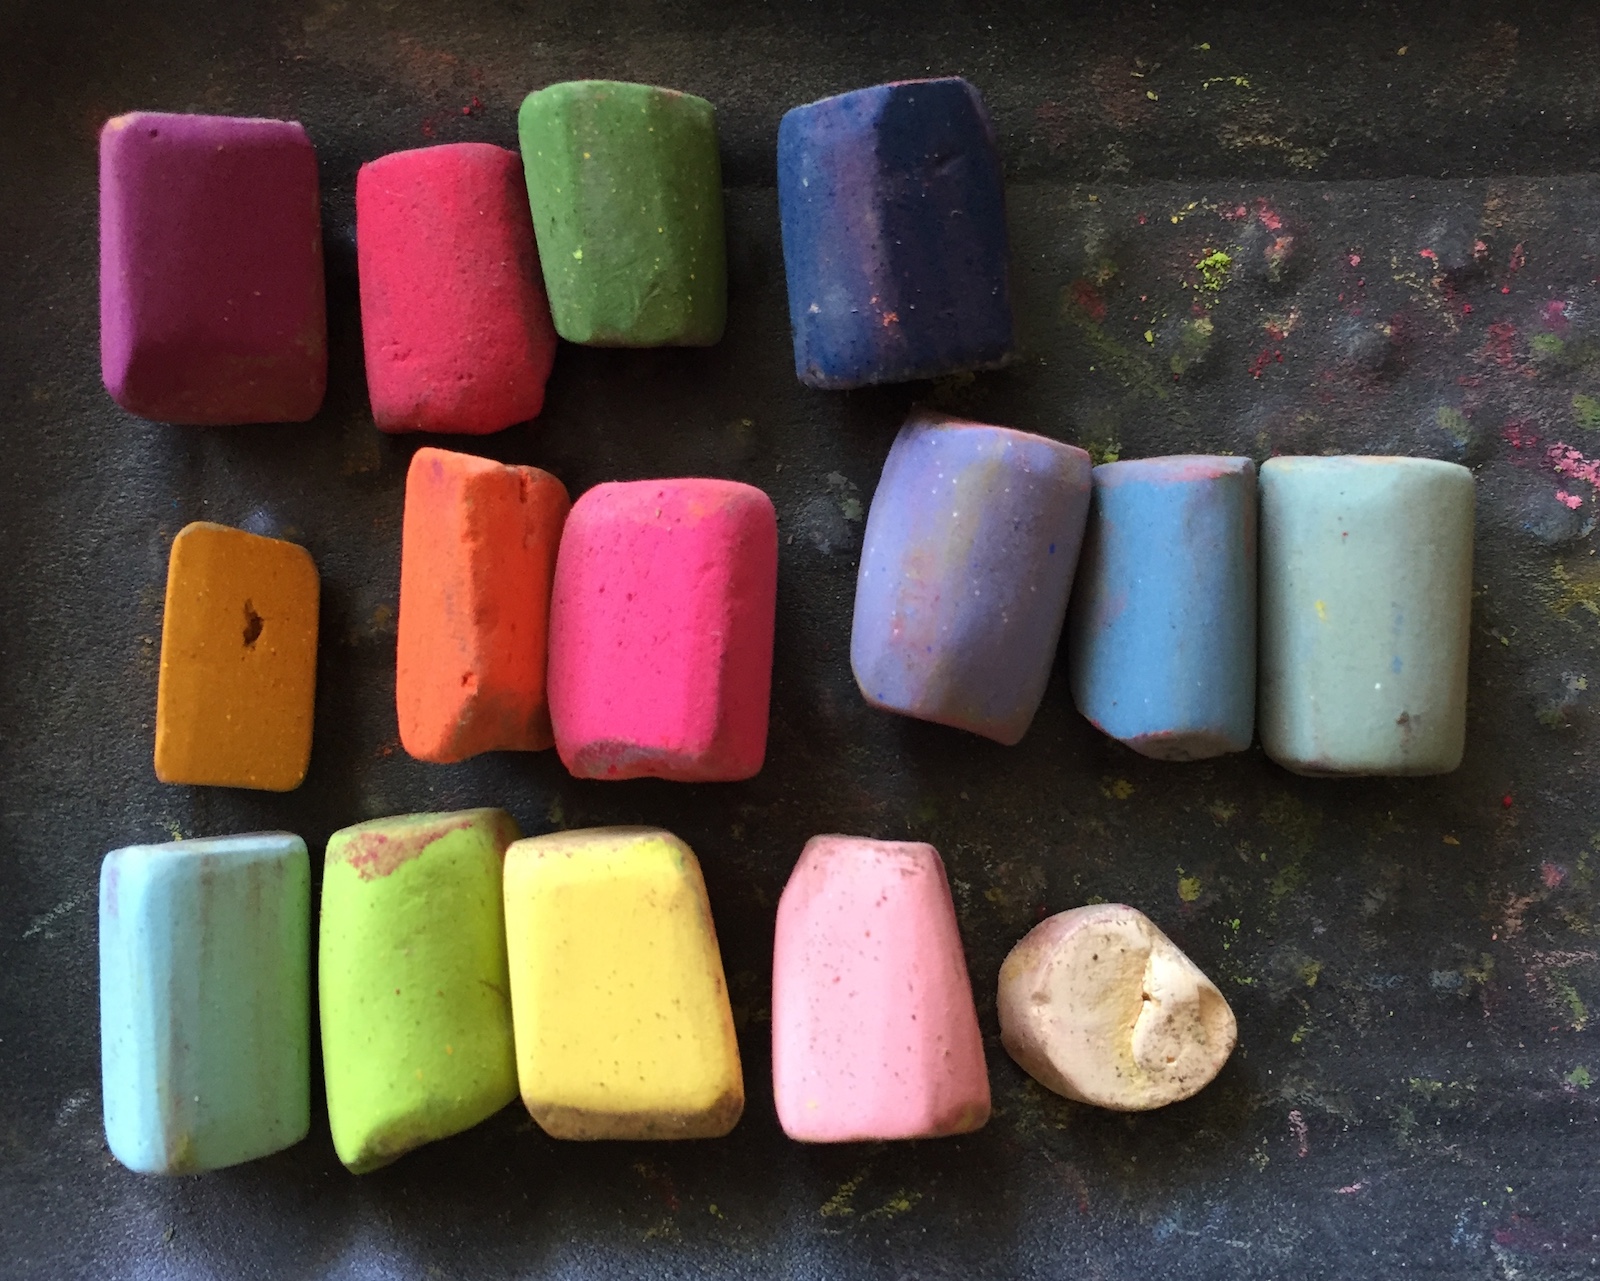
And here are the pastels I used. Mostly Unison pastels but I think that bright pink in the middle is a Mount Vision pastel! The first three pastels in a vertical line to the left are the first three colours applied.
Backyard plein air painting gives you the opportunity to paint outside in a safe place, away from onlookers and with a bathroom close at hand! It also affords you the chance to easily come back to the painting the next day if you run out of painting time (eg all the shadow patterns have changed!).
What do you think of backyard plein air painting? If you’ve been thinking you’d like to try plein air painting but are anxious about it, this is a great way to start. You can do a full view or zoom in on one plant like I’ve done. You can even go in closer and do a study of one flower. Remember, you don’t have to work large. Better to work small and then move on to another piece.
If you’re a seasoned outdoor painter, have you ever set up in your backyard to paint? What was it like?
I’d LOVE to hear from you so please leave a comment below. Tell me what you think of the idea of backyard plein air painting!
Until next time,
Gail














58 thoughts on “Backyard Plein Air Painting – Hollyhocks”
Love hollyhocks! Thanks for your demo,especially your limited palette.
Oh you’re welcome Ellen and thanks! It’s always fun pushing myself to restrain my colour choices.
Great step-by-step, thank you! I love seeing the black and white values.
Thanks Ann. Glad you like the inclusion of the black and white. I find it’s always good to check in on the values while working. This is trickier onsite but a quick photo with your smartphone in black and white mode will work.
Another gorgeous demo thank you Gail
Thank you so much Adrianne 😊
I’m lucky to live with the Rocky Mountains in view from my porch; but I have not yet tried a smaller floral. Thank you for sharing your journey with is. I learn so much.
Yes, lucky you Karla! What a grand vista to paint. And yet, yes, there are the smaller pieces of nature close and underfoot on which to direct your attention.
I’m so happy to hear you are learning on this pastel journey 🙂
Perfect timing! I was out in my backyard yesterday, painting the trees and leaves and the lovely late afternoon light patterns. Maybe tomorrow I’ll try the flowers in the front. Thanks for another inspiring post!
That’s wonderful to hear Marie!! There’s so much in our backyards to painting if we look closely 🙂
Hello Gail! I so look forward to your demo posts. This one was especially timely as I have just begun painting en plein air in my own backyard, and wow, am I ever being challenged! All in good ways, mind you. It was quite the process narrowing down equipment, color choices to pack in my box, support papers, etc.
The next huge challenge was learning to use my viewfinder properly and to simplify! Sounds so simple to do, but it is not so easy. Things are going better now, though.
I have a few backyard excursions under my belt, and with each one I have found myself thoroughly engrossed and energized in a way that studio work doesn’t always provide!
Thanks for posting this. 🙂 I look forward to more….!
Rhonda
Thanks Rhonda! I love hearing that you enjoy my demo posts. I laughed (in a nice way) at your list of challenges because I know exactly what you mean. It is quite a process as you say but once you’ve narrowed everything down, and then narrow again, it makes plein air life so much easier. Then you need to face the rest of the challenges!
And yes, there’s certainly I different kind of energy when painting on site. You need to be focused and intent as everything keeps changes especially the light! Thanks for sharing your thoughts!
Thank you for this step by step approach. I am especially interested in your beginning under painting. I love seeing how you layer your colors. Inspiring!
So glad you found this post useful Kathy! I always love looking back and seeing where a piece started. It’s sometimes amazing to me how it all comes together.
Thanks for sharing your plein air experience. I would not say that I am a seasoned plein air painter, but each summer I paint a hibiscus plant with dinner- size plate bright red flowers in my back yard garden., mainly in oils for some reason. I tend to do my pastel plein air painting in late summer when the light and shadow areas( southern exposure in this part of the garden) make for interesting compositions, but you have to work quickly, which makes pastel the medium of choice. Plein air painting is a wonderful challenge.
Love that you have a certain flower you paint every summer Cliff. Hibiscus flowers are sooooo appealing. And I like that you’ve shared that you prefer to do pastel work in the later part of the summer for the reasons you give. It’s good to know your own yard and when it offers the best painting views! And yes, the plein air challenge is one pursuing!
I have a short history with pastels, so your step by step instruction is most helpful.
When I see your cases filled with so many hues of colour, it makes me laugh at my limited palette.
Fran Hutton from Lethbridge taught a wonderful class on mixing pastel colours in 2016.
How rich to create one’s own hues ( at least once. ha ha)
Thank you for your motivation.
And Linda, your comment made me laugh as so many think my palette is pretty small. It is rather yummy though looking at all those colours!
Glad you’ve joined the pastel world and that you learnt a lot about mixing colours from Fran. I hope you’ll find lots here to inspire you!!
Thank you, Gail! I love the painting and the progress
pictures. I often paint flowers on our balcony. After
they have withered I always so happy I still have the
painting of them!
Thanks so much Barbara. I will be looking for your flowers on Instagram! You’re right, paintings keep the joy of a flower’s beauty forever!
Thank you Gail – a really helpful demo. It’s mid-winter here in New Zealand so a bit too cold to work outside but lovely to see your garden in bloom. Planning to try painting the flowers in my garden when springtime comes around….
Hah hah Penny, I knew when I wrote the post that the southern part of the world was in winter and wondered about reactions. Glad you’re now thinking ahead to painting your springtime garden 😀 Have to remember when they day comes to teach in New Zealand not to come during my summer!
Thank you Gail for this demo, it was just up my “garden” (street :D). I especially value your explanation of your choice of colours, very helpful!! – noticed that you unlike other artists do not rub the first background pastel with a foam bit to get rid of all the white bits, but it does not seem to be a problem later on in the process. – I have a very big garden and would like to do more plein air in it, but it seems so overwhelming with all the flowers and all the green: bushes, trees not to mention the background forrest next door. So please more garden plein air ideas. I can provide you with tons of photos if your garden lack motives 😀
Hi Susana, lovely to hear from you and that this post was helpful.
As to the pipe insulation, I use it sometimes but often it seems to rub off quite a bit of pastel especially in the dark areas. So often, as with this picture, I don’t bother and then deal with light specks as I go.
My suggestion to deal with the overwhelm of a lovely large garden filled with all sorts of wonderful things to paint is to get out your viewfinder and look at the world through that. It will show you smaller vignettes as well as larger areas. It’s such a handy wee tool. Try it and see what happens!
And thanks for the photos offer 😀
This is lovely Gail, you have inspired me to have a go at painting the beautiful hollyhocks I have growing in my garden, the same colour as yours! The value study was very useful. I’m a beginner and have learnt a lot from you so far – thank you!
I love hearing you’ve learnt a lot Jo! And oh yes, go after those hollyhocks. They are such majestic plants that add a gracious verticality to the garden. Let us know how you make out!
I find your layering process extremely fascinating! Lots to think about. Also the fact that you can use a limited palette appeals to me immensely. Thanks for sharing.
Thanks Dee! I love layering colours and seeing what happens. And yes, the restriction of a limited palette can make one more creative with colour!
Last year I bought a backyard…it came with a house. Thanks for inspiring me to get busy with painting as i have a lot I can work with:-)
Hah hah Nancy. LOVE that you bought a backyard 😀 And also glad to hear I’ve inspired you to get painting it!!
As a beginner, I so appreciate your generous sharing of the step by step. Beautiful!
Elaine
Hearing you say that Elaine makes me veeeerrrry happy!! I am delighted to help.
Gail, I have so enjoyed your blog material! This demo was insightful and answered a question I’ve been asking every time I start a painting – how shall I choose an underpainting color in each value? Just seeing your thought process and the actual result is instructive and useful to me as an artist. Thanks! I wish I were closer to your energy filled geographic area. I am on the east coast, in beautiful Maine. My hollyhocks are not yet open….
Mary Beth I love hearing that this post answered a question for you!! There are different ways to choose underpainting colours and this is one of the main ways ie. looking deeply to see other colours beyond the obvious. Another way is to use cool under warm and warm under cool. Of course that means a variety of possibilities. The thing to do is paint and experiment knowing that it may not work every time but every time you will learn something!
Now you’re prepared for when your hollyhocks do open 😀
Great job! Thanks for the step by step and your thoughts while painting. I need to paint more from my yard thanks for the reminder. I have been guilty of tweaking too much when back in the studio. Thanks for the warning reminder on that issue too! Lots of fun. Pretty!
Thanks Nancy! Glad you’ve been inspired to go paint in your yard. And I know the urge to tweak in the studio. Don’t be afraid to do this but stop when you find yourself picking at every perceived non-perfection!
Thanks for the details. It really helps to see and understand the steps.
You’re welcome Marsha. I love hearing that showing the steps is so helpful.
I want to offer you a general thank you for all the exploring you do to help out the rest of us. I’m living vicariously through you at the moment because it seems that time for drawing and painting is a struggle to find. I should be retiring in another year or so – maybe that will help to free up some space. In the meantime, I learn a lot about how to approach various situations by reading your blog. I so very much appreciate all your honest information on how things go as you work. It eases my mind as I see that things don’t always work out as planned, and the tools you use to evaluate where to go next. May you continue to offer this blog and make mistakes/have challenges for a long time to come, lol! It’s greatly helpful and it’s reassuring to see that you still make beautiful paintings even when challenges show up!
Debbie what a lovely comment. Thank you soooo much. It really motivates me to hear how helpful the blog is so no plans to stop!
A thought for you to paint a bit more: maybe have a small set of pastels out and a small piece of paper ready so it’s available to pick up at all times. Then set a timer for 10 minutes and just put pastel to paper. The main thing is to not be judgemental. Making a mark, no matter how unfortunate it may turn out, is better than making no mark at all. And there is a certain joy that comes from holding a pastel, feeling its softness in your hand and the contact between it and paper as it lays its luscious pigment down. That alone is a reward and will relieve some of the pain you feel at not painting. Perhaps this earlier blog will inspire you: https://www.howtopastel.com/2017/07/10-minute-painting/
Lovely painting. I particularly like the looseness. It is so hard for me. Hope to take your workshop in the fall and learn more about how to achieve it.
JeanLee thank you! Look forward to seeing you in my fall workshop!!
Thanks Gail!! I learn so much from the progressions you post here. And congrats on being accepted into Uart’s pastel competition!!
Thank you Ruth – always happy to hear these progressions are helpful. And thank you for your congrats! I finally thought I should enter the UART competition so was chuffed (and truth be told, relieved) to have a piece accepted!
I love this idea & have a clematis that I’ve started to paint from a photo a number of times. Oops, then I remembered the resident woodchuck that lives under the shed – I can imagine getting so involved in painting that I don’t realize it’s sneaking up on me …ugh!
Hah hah Maxine!! Get thee out to the garden and paint that clematis and tell that woodchuck to keep well back!!
What a great demonstration! And so appropriate with the upcoming rose challenge.
Seeing the progress was so helpful and the black and white clarifies the values
so well. Thanks, Gail!
Gosh you’re so welcome Wendy!! I do love hearing that what I show and say is helpful. Look forward to seeing the rose challenge results!
Great idea to paint in your own yard. I have trouble concentrating out in the big outdoors. Your step by step is sooo helpful. Thanks for another great lesson, Gail, and I’m sure you’ll have a blast at the workshop!
Thanks Katie. Yes the overwhelm of the outdoors can be rather paralyzing! Try a viewfinder and also making thumbnail sketches to hone in on what you want to paint and what you want to say and share with others. Like my example, you can zoom right in and pick a small piece.
And I’m looking forward to the workshop!!
Thank you Gail absolutely delightful. You have given me courage, because although I paint Plein air I always use Watercolor and then come home and create pastel paintings from my little sketches
Ahhhhh courage Glenda! The fact that you already work en plein air in watercolour means your steps ahead. So yes, do try something in pastel. It’s pretty awesome!
Hi Gail! I love this lesson and your Hollyhocks! I recently decided to plant some! Also I’ve been thinking of doing the same thing in my yard! Your article has encourageed me; now I just need to get out there! Thank you! Denise Page ❤️
Always happy to hear I’ve inspired the painting bug Denise! Getting outside to paint can be such a production so I think starting in your backyard will make it a bit easier to get going. Let us know what happens!
I thought this was fabulous. You’ve given me great ideas for painting outside. Would you take numerous photos so you go over the steps later?
Thanks Andrea! And I’m glad you have some ideas to get you going outside.
As to your question, I think taking a few photos as you go is always helpful as it shows you the journey you took. Often though, I get into my painting and forget to take photos, even when I am doing it so I can write a blog about the process!
Is there anyway of downloading this wonderful lesson on hollyhocks?
Not really Andrea. But you can bookmark the page for future reference.