We had a plan. I would go to Salt Spring Island for three days and I, along with my mum and dad, would go out to work en plein air every day. It had been sunny for weeks. I went to Salt Spring and the next morning…. it was cloudy. And cool. And grey. Really. And this continued for all three days. Argh! That wasn’t going to stop us though! I looked around indoors and even though I was surprised by the subject I chose, I decided to take on the challenge of painting a bouquet of flowers. Not any old bouquet mind you. This was a bouquet to celebrate Mum and Dad’s 65th wedding anniversary (!).
This bouquet painting was no easy task. The bouquet was hardly colourful (and you know how I love
I worked on the pastel over two mornings. After day two, we all had a look at it and my dad pointed out the lack of interest on the left side especially when compared to the rest of the bouquet. I agreed. So back in Victoria, I spent time adding a little bit to the painting. I was so concerned about overworking it! Very near the end, I made a small change. You’ll see that below.
Let’s get started.


Back in Victoria, I take a look at the piece. I haven’t seen it for a week and can see things I need to change or tweak. For instance, as mentioned earlier, I wanted to add more interest and dynamism to the left side of the bouquet. I raised the lip of the vase and slightly flattened the ellipse. And at the last minute, in a spontaneous moment, I added a second side to the table. I felt it would help the painting which I think it does.


The pastels I used 
The pastels I used shown in black and white to reveal my three main values.
Painting a bouquet of flowers, especially this bouquet, was a challenge, but stretching yourself as a painter is when you explore the edges of your skill and knowledge. It tells you where your strengths are and also where you may need more practice. I found it kinda scary dealing with so little colour (but as you can see, my painting is still pretty colourful!) and also a bouquet of not very defined flowers (except for the gladiolas).
Also a secret. With our plein air adventure scuttled, did I really feel like painting? Truth be told, NO I did not! I felt like climbing into a comfy chair with a good book. But I pushed through that temptation and did that work and that’s what felt reeeeeaaaalllly good. The process of painting (no matter what the outcome) is FULL of pleasure! (Did you see my recent blog on this very topic?)
A wee bit more…..On the third day, we decided to take a drive and do a sketch somewhere despite the grey day. For my sketch, I worked in three values thinking perhaps if there was enough info in the sketch, one day I’d create a painting from it. Here’s the sketch:

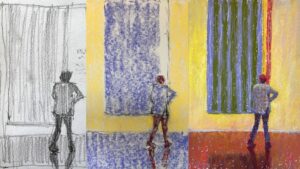
And, one more thing, on the two days I painted the bouquet, Mum sketched me!! Here are her two sketches. (She added the colour wash later.)


Joanne Sibley, Pen and ink sketch of Gail with watercolour added. 
Joanne Sibley, Pen and ink sketch of Gail with watercolour added.
Fun huh?!
And that’s it for this time!! You know how I love to hear from you so do please leave a comment!
Until next time,
Gail











22 thoughts on “Painting A Bouquet Of Flowers – A Very Special Bouquet!”
Love it.
You make it look so simple and yet……so lovely and unpretentious.
Thanks Gail Always look forward to your emails. One of these days Ill be brave and try to do some drawing.
Margo Hayes
Thanks so much Margo!!
And now it’s your turn to be brave. Do some drawing. Think of it as exploration with eye and hand with no judgement or expectation. And remember, it can be just for you.
Oh, how fun was this and a challenge for you, too. I love seeing your work and final paintings. I have learn soooo much from you. Thank you, Marcy in Woodland CA
Thanks Marcy both for your compliment and your appreciation!!! And heck yeah, it was definitely a challenge 😬😎
Thanks again for sharing from your experience. I hope you had a nice time together in spite of uncooperative weather. I love all that you’ve posted here. Looking forward to seeing what you do with that great little sketch!
Thank you and you are so welcome!! And yes, I had a wonderful time (and truth be told, I always do).
And the sketch, let’s see what happens!
I can’t imagine you doing any painting without a lot of color!! 🙂 You turned a somewhat colorless bouquet into a very happy colorful color bomb! Lots of energy there! Also, happy 65th anniversary to your mom & dad. That’s fabulous! And, I love that you and your mom paint together. Makes me long for my mom who passed away many years ago. She painted also, but only when she retired & lived a good distance from me. I can imagine how fun it must be to be able to do that together. Thanks for sharing Gail!!
Hah hah. Yup I AM the colour fiend aren’t I 🤣
I’m sorry the post brought up the longing for your Mum Ruth. Your words do make me ever so grateful that I still have my lovely parents to play with. And that they live close enough that we can paint together. And laugh. And have fun. Thank you for the reminder Ruth.
It is really a wonderful pastel. You captured the casual lightness of the bouquet. I enjoyed seing your process and hope one day soon to attend one of your workshops. Thank you for sharing your work!
Lori thank you!!!! I appreciate your kind words. And I look forward to seeing you in a workshop one of these days! 😁
Love it.
Whoo hoo!!! 😊
What a lovely pictures your mum made from you.
Yes! I love that we sat together making art, each in our own world yet connected.
I like that you rounded out the bouquet from your original sketch. Also adding some bright bits of color in the upper middle of the bouquet. I was wondering if you were going to make it near the start but you did.
Thanks Patricia! It’s so interesting how a painting takes on its own life and then we respond to its needs as we move forward.
I love the picture of the flowers! Thanks for sharing your process. Looking at the beginning and middle of the process, it always amazes me how the final steps seem to create the picture out of thin air.
Thanks so much Jessica!
Yes, I’m always amazed to see where the journey of a piece and where the final has travelled from. Knowing that there is always this chaotic ugly stage helps me to push through!
Dear Gail, sorry for being a bit late with this comment. I’m always excited to get your emails and take my time to thoroughly read and enjoy them. What a great article and lovely painting and sketches! Thanks a million for sharing your knowledge, your art(making) and personal experiences. I love your bouquet of flowers impressionist style. When painting flowers I find it most difficult to render the spaces BETWEEN the flowers! You make it look so natural. I learn a lot from your step-by-step explanations and colour choices. Warm regards, Gabriela
Many thanks Gabriela! I love that you love receiving my emails and I love knowing these blogs are helpful 😀
I know what you mean about the spaces between the flowers being difficult. Looking at those spaces (the negative spaces) and trying to make them be, in your mind, as important as the subject (the flowers) is where the shift can happen. All the places on the paper are the same – it’s through the representation of objects where some bits of paper take on more importance visually than others. Make sense?
Love your demo and thoughts!
Your mom is so talented too!
Thanks for the inspiration🌷
Penny
Fantastic to hear Penny!
And yes, my art leanings come from my Mum AND also my Dad. I’ll get him on here one of these days!!