Clouds – beautiful yet oh so tricky to paint! They often turn out looking too dark in a painting. They can also look toooooo solid. And what about when they look a bit two-dimensional?! Argh!! Enter Liz Haywood-Sullivan! Liz is a master at painting clouds and all manner of skies. I knew she’d be able to help us all so I asked if she’d contribute a guest blog on the topic. I’m delighted to say she was happy to share some thoughts and ideas.
Don’t know Liz Haywood-Sullivan’s work? Take a peek.

Now before I hand the blog over to Liz, here’s a wee bit about her…
Liz Haywood-Sullivan Bio
Liz Haywood-Sullivan, PSA-MP, IAPS/MC, is a representational artist specializing in pastel landscapes. Dedicated to working in the pastel medium since 1996, she teaches nationally and internationally. Liz is a sought after judge and demonstrator for pastel societies and arts organizations around the world. She is a President Emerita of the International Association of Pastel Societies (2013-2017) and is the author of the popular book Painting Brilliant Skies and Water in Pastel. Her pastel paintings have won numerous awards, have been featured in national, international and museum exhibitions, and are included in private and corporate collections worldwide. See more of her work here.
And now here’s Liz 🙂
~~~~~
Chasing clouds…this term is the best way I know to describe the attempt to paint clouds on location. They just won’t stand still and pose for you the way a tree does. How do you capture them? How do you slow them down long enough for your pastel painting to catch up?
Why not just paint clouds from photographs? That seems to be an easy answer. Cameras can be a wonderful tool for painters – but you should be aware of their limitations, in particular when it comes to shooting clouds.
Most obviously, photos flatten and reduce the dimensionality you see when observing clouds in person. But they alter critical value relationships as well. When studying clouds look at how close in value the lightest areas are to the darkest ones – realize that photos increase this contrast. Greater contrast will enhance cloud edges and makes clouds look heavier than they are. Look closely at the edges of clouds to see how translucent they are, and how much of the sky is visible behind the edges

Every Photographic Device Is Different – What Do Your Devices Do?
Try this. With your camera, cellphone, or recording device, take a photograph on a partially cloudy day, one that contains both clouds and sky. Hold up the image and compare the photo with the actual sky – observe what your device does. My camera increases contrast over the entire image, making the sky darker and making clouds much more contrasty. My cellphone does the same, but also adds a strong shift towards blue.
If you paint directly from your photos, try to use your photos as reference only. Remember the scene you shot as best you can, and when painting, compensate for the distortions caused by your recording device. Also, try going into some of your device’s editing programs and make adjustments while on site, using the actual sky to guide you.
Do Cloud Studies
If clouds don’t stand still, and you want to paint them en plein air how do you do that?
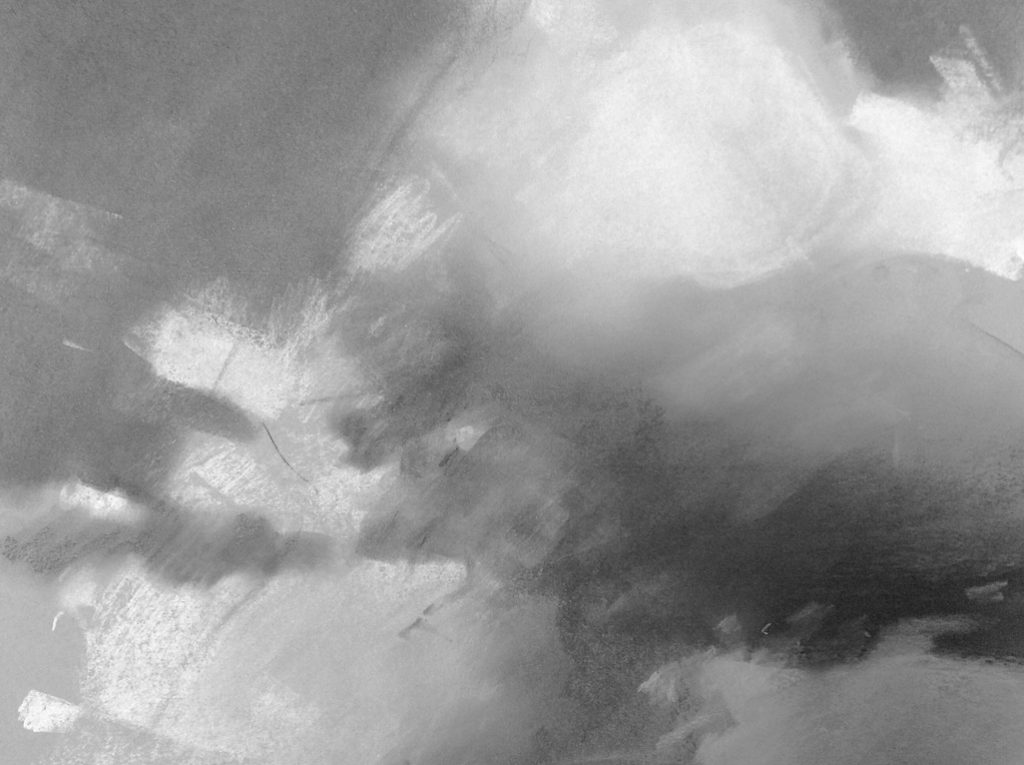
Try doing cloud studies. Lots of them. From life. Doing regular cloud study sessions will improve your fluency in drawing them. You will begin to understand their language of translucency and patterns of movement. You’ll see how light bounces around and reflects within a cloud form. You’ll observe how clouds drift, evolve, grow, and dissipate all within moments. You become aware of their vapor nature.


Slow Down To Really See
To study clouds in this manner you will need to slow down to really “see” the aspects of a cloud. It takes concentration to teach your hand to follow and draw what you are seeing. Choose a small section, or passage, of a cloud, not the whole sky. Focus on drawing each passage for five minutes. After five minutes the clouds will have changed, so move onto the next study. This invaluable eye-hand drawing coordination is essential training for any artist, and this is an excellent way to practice it.
Materials For Cloud Studies
This part is really easy. Three items, that’s all you need.
- Strathmore Toned Gray sketchpad – 18 x 24 in
- Derwent Fine Art Charcoal – XL 06 White (Edited April 2023 – this item doesn’t appear to be currently available. An alternative is General’s Compressed White charcoal.)
- Vine Charcoal
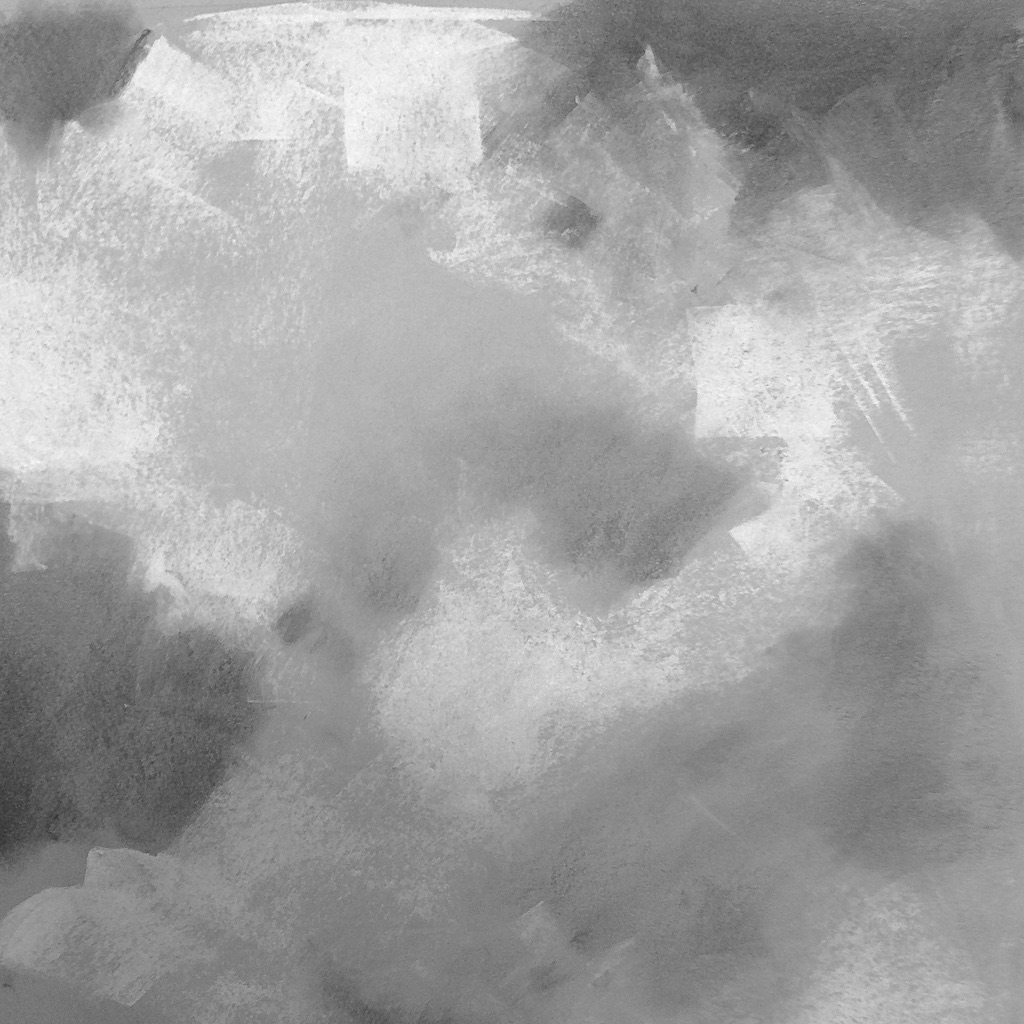
I suggest working in a large spiral-bound sketchpad. Working at 18 x 24 in helps keep you loose and making large fluid marks. It prevents you from getting caught up in the details. Do quick five-minute studies that are essentially gestural drawings similar to what you might do as warm-ups in a figure class.
I use mid-tone gray paper with a piece of vine charcoal and a big piece of white chalk. Yup, chalk, not pastel. These are big bold messy sketches, nothing precious, nothing meant to frame and put on the wall. Chalk and charcoal work perfectly. Strathmore makes a beautiful mid-tone pad of paper in gray or beige. The gray color is a perfect starting midtone for clouds.

I begin by developing any darker areas with the charcoal, smearing it with my hand to create a nuanced wispy look. Then the chalk goes on top to pull out highlights, again blended in to create the look I want. In a five-minute sketch there is no time to fuss around with details, plus the details keep moving anyway. You are just trying to capture a moment of time before it passes. All you have time to do is react. You don’t even have time to really think about what you are doing – sometimes not a bad thing.
How Doing Cloud Studies Can Improve Your Plein Air (and Studio) Painting
Drawing cloud studies will translate to your painting by developing your knowledge of cloud forms – becoming muscle memory when you go to paint them.
When you set up to do a plein air painting, including a sky with clouds, here is a suggested way to proceed:
1. Start with a thumbnail and or value study. Establish the land mass composition, and start watching the sky carefully.
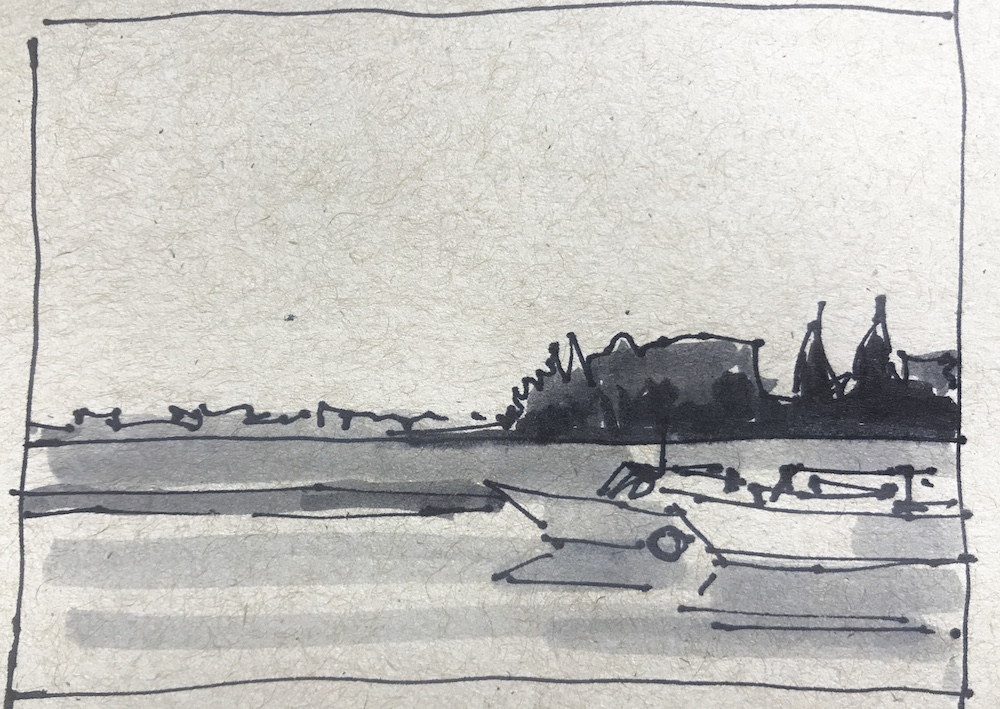
2. As the clouds pass by you might sketch a few of the cloud arrangements that would look good in your painting. Just do quick gestural notes, with big shapes, no details.
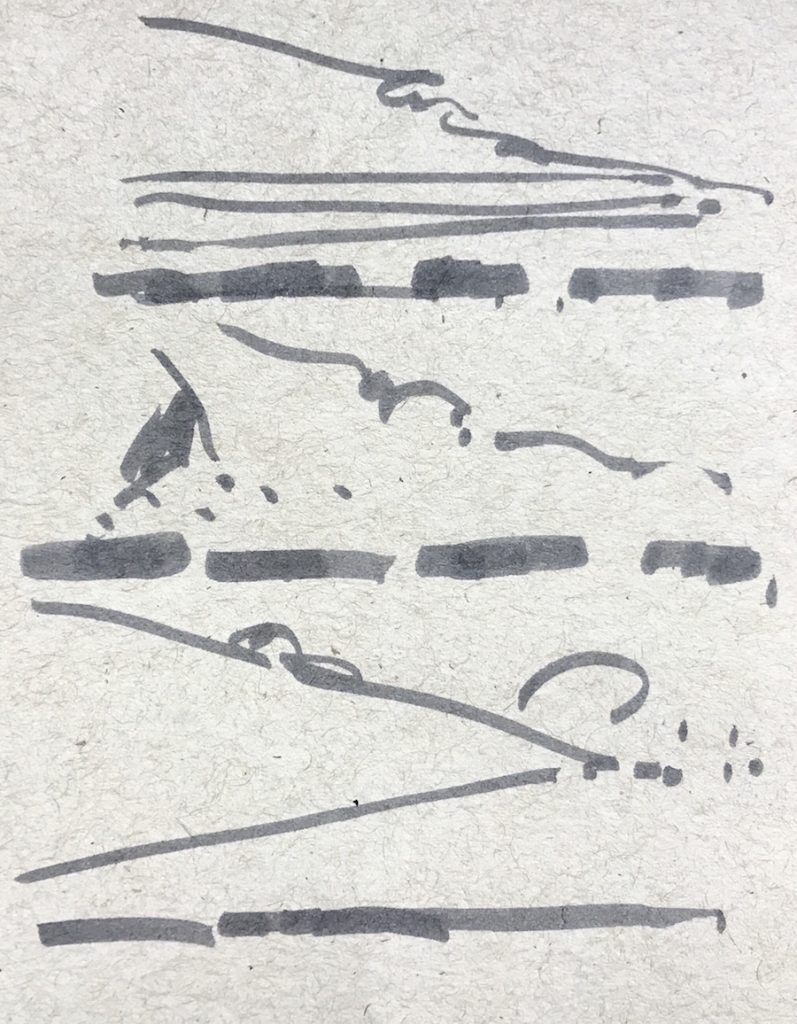
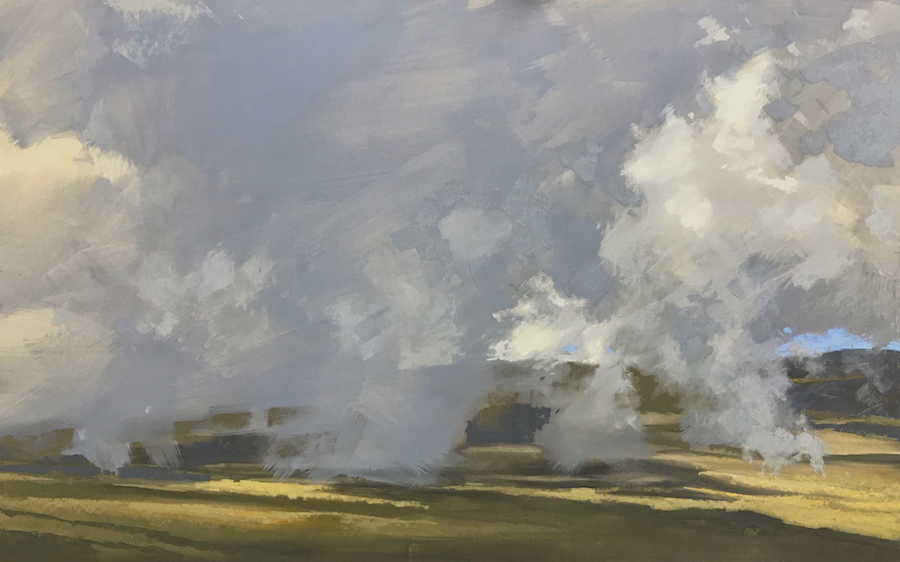
3. As you start to work on the painting, continue watching the sky. At some point you will see a cloud arrangement that fits your painting composition. Sketch in the location of the clouds on your painting, locking in the forms. No real details just large shapes. You might go back to your sketchbook and do a quick study to refer to later, like shown here.
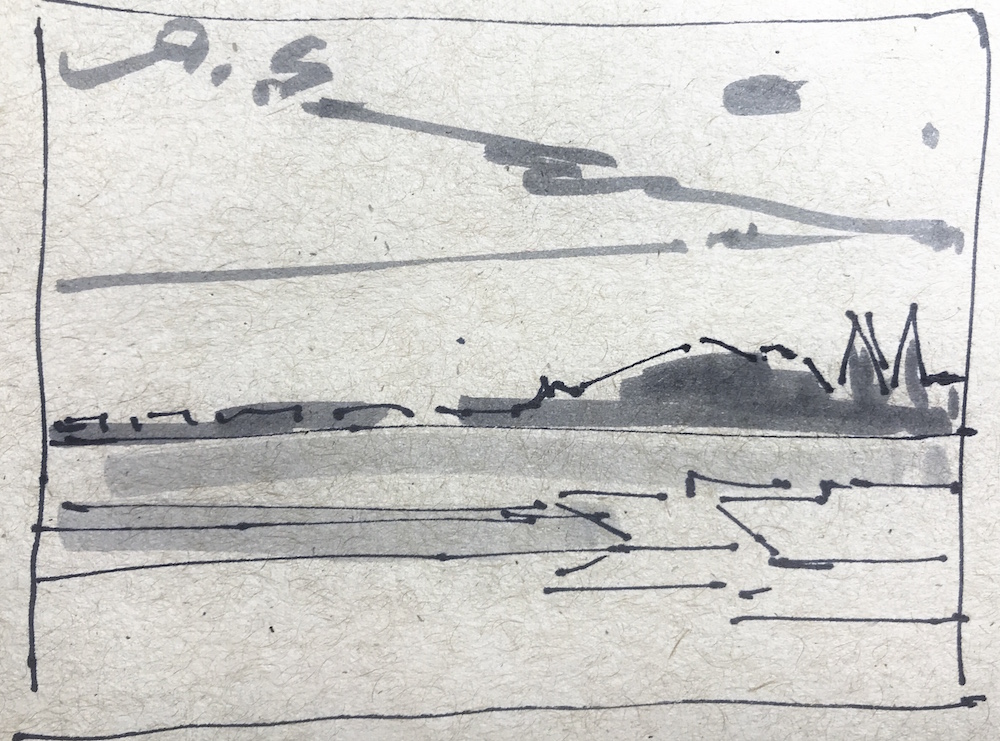
4. Although the actual clouds will be moving, refer to other areas in the sky to capture accurate color and values of the cloud forms you have locked in.

Muscle Memory Can Be Pretty Powerful
So how do you paint from the sky when the clouds have shifted from when you locked in the composition?
This is where doing all those clouds studies come into play. You essentially paint in the clouds by using these three things:
1. First, follow the sky shapes (#3 above) you locked in on your painting.
2. As you begin to paint the sky, look up to the current cloud configuration and find passages that resemble your sketch. The exact cloud shapes will have changed but the lighting and small cloud passages will still be similar enough to work from.
3. Call upon your memory of having done your cloud studies to work these passages together into your painting. The good thing is that there is no perfect cloud shape so you can make it up as you go along and no one will know.
Start Chasing!
Next time you see a sky full of beautiful clouds all you need is a half hour to capture a handful of studies. Toss a sketchbook, some chalk, and a stick of charcoal in the back of your car to be available at a moments notice. If you practise chasing clouds, you will be well on your way to a better understanding of their nuances, and the knowledge you gain will start showing up in your next cloud paintings. Enjoy!

*****
Wow!!! I love these tips from Liz Haywood-Sullivan on how to practise capturing the ever-changing nature of clouds! I appreciate the idea of doing the studies LARGE! I’ve done studies before but they tend to be small.
Now we’d LOVE to hear from you!! Are these tips helpful? What’s your take on being a cloud chaser? Do you love painting clouds or avoid them like the proverbially plague? Do let us know by leaving a comment. Also feel free to ask Liz any questions about this topic.
Until next time!
~ Gail
PS. At IAPS this year, Liz kindly did a short video with me on painting skies. Since it ties in very nicely with this blog, here it is!
And here’s a link to Liz’s book:
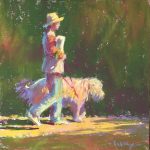
And for those of you who stuck it out to the very end, a bonus image from Liz Haywood-Sullivan!!















45 thoughts on “Liz Haywood-Sullivan – Be A Cloud Chaser!”
This was really helpful. My clouds were often heavy, like mashed potatoes! Now I know how to work on getting more adept at clouds. Thanks!
So good to know it was helpful Rochelle! It’s funny that mashed potatoes simile – I know those clouds!
Thanks for featuring Liz H-S Gail. Appreciated the short list of supplies for “sky chasing” and the video- part to make a small hole with your hand to see value! I’m fortunate to be from Lizs’ area so her work is very personal to me. Finding a flyer from Vose Gallery at my local library got me to switch from oil pastel to soft! I visited her latest show at Vose and was likely drooling, can’t get enough of those clouds!
Glad you found lots here to love Brenda! How interesting that it was your connection with Vose Gallery that persuaded you to switch to soft pastels! I wonder how long ago that happened? I envy you seeing a whole show of Liz’s work!!
Oh, how wonderful that you saw all those stunning paintings in person, Brenda! I’d be drooling too!
I’m the lucky girl who has on her wall the demonstration painting that inspired Liz’s Vose feature painting, “Walk this Way”. Not a cloud in sight and very different because mine is not done on a black background, but full of light, and a joy to behold every day!
Check out her Spring 2019 newsletter to see the comparison.
Thank you very much Liz and Gail for this informative article, I LOVE these sky paintings!! I have considered buying Liz’ book before, now I know it’s a must-have! Just one question for Liz: What kind of underpainting do you prefer, wet or dry, what colour?
I will definitely start doing sky studies too….
As always, this blog post gives me a rush of motivation! By the way, to everybody reading this, I can highly recommend Gail’s personal critique service. Just done it and I got so much information and input, almost like I had attended a personal workshop with Gail…
Warm regards, Gabriela
So glad you found much to motivate you in Liz’s post Gabriela. And a great question which I will hand over to Liz.
Look forward to hearing how your cloud studies go 🙂
And thank you so much Gabriela for your kind words recommending my video critique service!!
Thank you for this! Excellent study suggestions for making clouds light and airy vs. mashed potatoes!
Glad you liked Wendy! I can’t wait to try these studies!!
Gail, this is incredible. I just bought the Terry Ludwig Liz Haywood-Sullivan sky set! At long last available in Europe! I can’t wait to use them, as I live on the top floor, in the clouds literally!
Very useful blog, thank you so much.
Nancy Malard
I love “incredible” Nancy 😀 The timing certainly seems serendipitous!
Let us know how your experiments with Liz’s TL set goes.
Hi Gail, As you may have guessed, I sort of specialize in “skyscapes”. These unbelievable colors will give me a much needed boost, as will your precious blog post. One can only make progress, is it not?
Warmly
Nancy
One can only make progress indeed!
🙂
I am lucky enough to have done an art retreat with Liz here in Australia last year, and look forward to Greece next year! I also have one of her beautiful demonstration paintings on my wall.
Liz is a great teacher and such fun to be with, if your readers have the opportunity, do a workshop with her, I can’t recommend her highly enough!
I do love painting clouds, sometimes they work and sometimes … er, not so well. I know it is a matter of practice and muscle memory because when I paint regularly I just seem to know what to do.
This blog complements, and adds to, what I learned from Liz last year and the information in her book. When I’m on holidays I’ll try doing some quick, big cloud studies, and then maybe I’ll impress her next year.😉
Cathy how lucky that you have had the opportunity to study with Liz! I saw that she was teaching with Artable in Greece next year! (I myself am planning to do a retreat with them in Tasmania!!) That will be amazing I’m sure!!
I love that you shared with us your experience painting clouds and how much just doing the work can help one as an artist.
I can’t wait for you to do those cloud studies and surprise the heck out of Liz when you see her!!!
I’ll keep an eye out for your Tasmanian retreat, Gail. You’ll love working with Gillian and Artable and you’ll love Tasmania!
I’ve been there twice with Richard McKinley and will do his next “masterclass” there in 2021. By then I’ll be retired and I’ll have much more time for art! Woo! Hoo!
So good to hear about working with Gillian/Artable Cathy. I can’t wait to go to Tasmania. I’ve wanted to especially after writing this blog post on Florence Rodway!!!
Retired by 2021!! Whoop whoop!!! And a masterclass (another one!) with Richard McKinley will be a perfect jumpstart to full-on art-making!! 😀
Wow, Gail! Thank you for that link to Florence Rodway. I have to admit (shamefully, as an Australian) to not being familiar with her work. What a lot of research you did, fascinating to see how her style changed. All are truly beautiful paintings, but I’m in awe of her linear works – how could she manage so much with so few strokes?
Isn’t her work amazing?! I know a LOT of people don’t know her work which is why yes, I spent a LOT of time researching and writing this blog post. Glad you enjoyed it. Look closely at the work. And try copying it. 😀
Fantastic guest post! I love Liz Haywood-Sullivan’s helpful info about painting skies (I have her book) and I plan to start doing my own studies asap. I always learn something on your blog. Thanks for doing it.
Thanks so much Marie for you kind words. Glad you loved this post by Liz!! I do hope you’ll get to those studies as it’s so easy not to get to them.How about leaving us a comment in a week or so saying you’ve started doing them!!!
Just great info.I love painting outdoors,and getting outdoors and sketching.
Too many folks try to copy their printed photos, instead of going out and observing the real world.
Thanks.
Glad you got something out of it Suzanne!
And yes, there’s nothing like painting in the environment, being part of it, and having all of that somehow reflected back in you painting. Working on location becomes a full-on response to nature and the world rather than a deliberate recreating of it. Sometimes though, working from photos is the only way to go for some folk due to various circumstances. Still, even a wee bit of painting en plein air can give an understanding of how colours and values work in the real world that can then be brought into the paintings worked up from photos.
Excellent guest blog and interview. I once saw a reproduction of Constable’s sketch book studies of clouds in pencil. The results were mind-blowing, he could get the impression of a huge sky in a sketch only a little larger than a thumbnail. I tried for ages to emulate them with a spectacular lack of success and lots of frustration. I think working larger and limiting both my scope and my ambition might be a better way to go. I will order the grey sketchbook and give it a go. Thanks to you and your guest for sharing.
Glad you enjoyed it Eddie. Thanks for sharing your experience with seeing and emulating John Constable’s small pencil sketches of clouds. Interesting that you just couldn’t make them work for you! I hope that the larger scale will be beneficial. I know I can’t wait to try them!
I haven’t seen Constable’s pencil sketches but love his oil studies for instance this large one at the Tate (love that they have to say about the difficulty he had working large!). There is also a book out on Constable’s Skies. You can have a look here.
I’ve never thought about doing cloud studies. And so big! Thanks again for some great insights! I’ll never look at the sky in the same way again.
Helen, I’ve done cloud studies but usually very small. I’m excited to try bold big ones now!! What about you??
I am fortunate to live a few miles from the coast, where I am in England and it’s a lovely area for viewing lots of clouds because the land/seascape is minimal. I really have a considerable desire to do more sky pastels but do struggle somewhat when it comes to putting the landscape bits in as “support”. I was impressed by the size of Liz’s final works…36×24 inches is pretty big, I have enough trouble with a 12×9! Her charcoal-and-chalk tip makes a great deal of sense and I’m actually now feeling fidgety and wanting to get started with something!
Love love LOVE hearing that Chris!! I hope you relieved your fidgetiness by doing some studies. Don’t think, just DO!
You’re right, Liz’s work can be LARGE which is probably a good reason to work with large studies. As to including land masses along with skyscapes, if you go to Liz’s website or the Vose Gallery one, you will see more of Liz’s work some of which include more land. Maybe that will inspire you in your struggle regarding adding landscape as support.
I really enjoyed Liz’s helpful suggestions. I am going to take her advice as I just love to observe and paint clouds and I know it will help improve my paintings.
Wonderful MaryAnn!!! Let us know how using Liz’s suggestions works out for you and your paintings.
Wow. This was wonderful. I was reminded of Constables prolific study of clouds, some of which are on display at the V&A in London. But, wonderful as his cloud paintings are, I don’t think he quite got the message that Liz is saying here about clouds being vapor, not mashed potatoes. That message needs to sink in. And I love the idea of using large paper for the studies. This blog post will be with me for a long time, and provides a lot of fodder for my practice. And the video; using my hand to make that small hole to view the value changes is a real ‘eye opener’, pardon the pun. I loved this blog post. Thanks so much to Liz and to you Gail for always being on the lookout for something new to inspire us.
So interesting that you thought of Constable and his cloud studies just as Eddie did above. In reply to Eddie, I linked to a study in the Tate and here I’ll link to a study that’s in The Clark Art Institute. I also love this one (with land included) at the Tate. As much as he studied them, unlike many of us, he never experienced them, being a move them or flying through them, seeing them from the top and side rather than just below.
So yes, no mashed potatoes!! I’m so happy this post resonated with you so much with you Jean and I can’t wait to see what comes from you as a result of it!!
I’m looking forward to it to, Gail. One of my all time favorite paintings is Constable’s Hadleigh Castle, A Study, that lives at the Tate. I’ve not seen in person the painting this was a study for, but from photos it looks static in comparison. The study which is something like 6″x3″ was painted at a turbulent time in his life. It is stunning, and includes lots of clouds.
Thanks for the link to technical info about the sketch. I think though it’s closer to 48 x 65 in….HUGE. In fact almost the size of the final painting (at Yale Centre for British Art) Or am I missing something? (And please correct me if I am!!) All in all, fascinating rabbit hole we went down. 😀
You’re right, Gail. I meant to say 6’x3′ which is closer. It is quite large. An amazing painting which has captured me each time I’ve seen it. We have indeed gone in a very interesting direction.
I LOVE these kinds of conversations!! Thanks Jean. And I envy you seeing the real thing.
A very timely blog for me. Just finished a painting with lots of colorful clouds for a friend of mine. I’ll take a look again and try to practice that water vapor look instead of mashed potatoes!! 🙂 Thanks for another fabulous blog, Gail!!
So good to hear when the timing worked perfectly Ruth!! Hope you’ll have fun working on cloud studies. (I think this could be a Friday Challenge in FB group!!)
What an inspiration….I’m ordering her book, as well. She’s an absolute master of skies and water….(got her Ludwig “Skies and Water” set a couple of years ago….great color choices!) I also love the idea of carrying the toned paper pad, white chalk and charcoal. Gonna try this, too. I have amassed a large collection of sky photos over the last couple of years….
Anxious to get started…..thanks, Liz and Gail….
Curtis that’s wonderful! All of it!! I hope those studies you’ll do on toned paper create a knowledge bank for you to then create from the photos you have collected. Go go!!
Great informations Gail. Love the idea of sketching the clouds! Will certainly follow that advise. Thank you for taking time to post the vlog.
Oh you are soooooo welcome Urszula!! I hope you can make those cloud studies happen 😀
I love your blog Gail and this article by Liz has been so useful. Thank you so much.
Thank you so much Lorna!! And I sure agree about Liz’s guest post!!