PanPastels. This is a medium I’m not familiar with. Since I’ve had a number of people ask me for information on this product, I thought I’d search out someone who could tell you about it.
I’ve also had other readers ask me to do a blog about wildlife painting.
In my research, I came across the artist Alex Louisa who paints wildlife using PanPastels. What could be better?! Happily, Alex agreed to guest blog. 😀
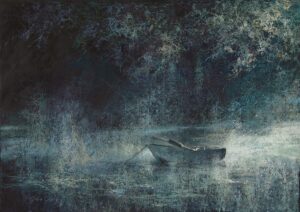
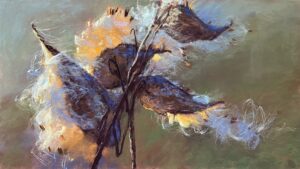
Don’t know her work? Here’s a teaser:

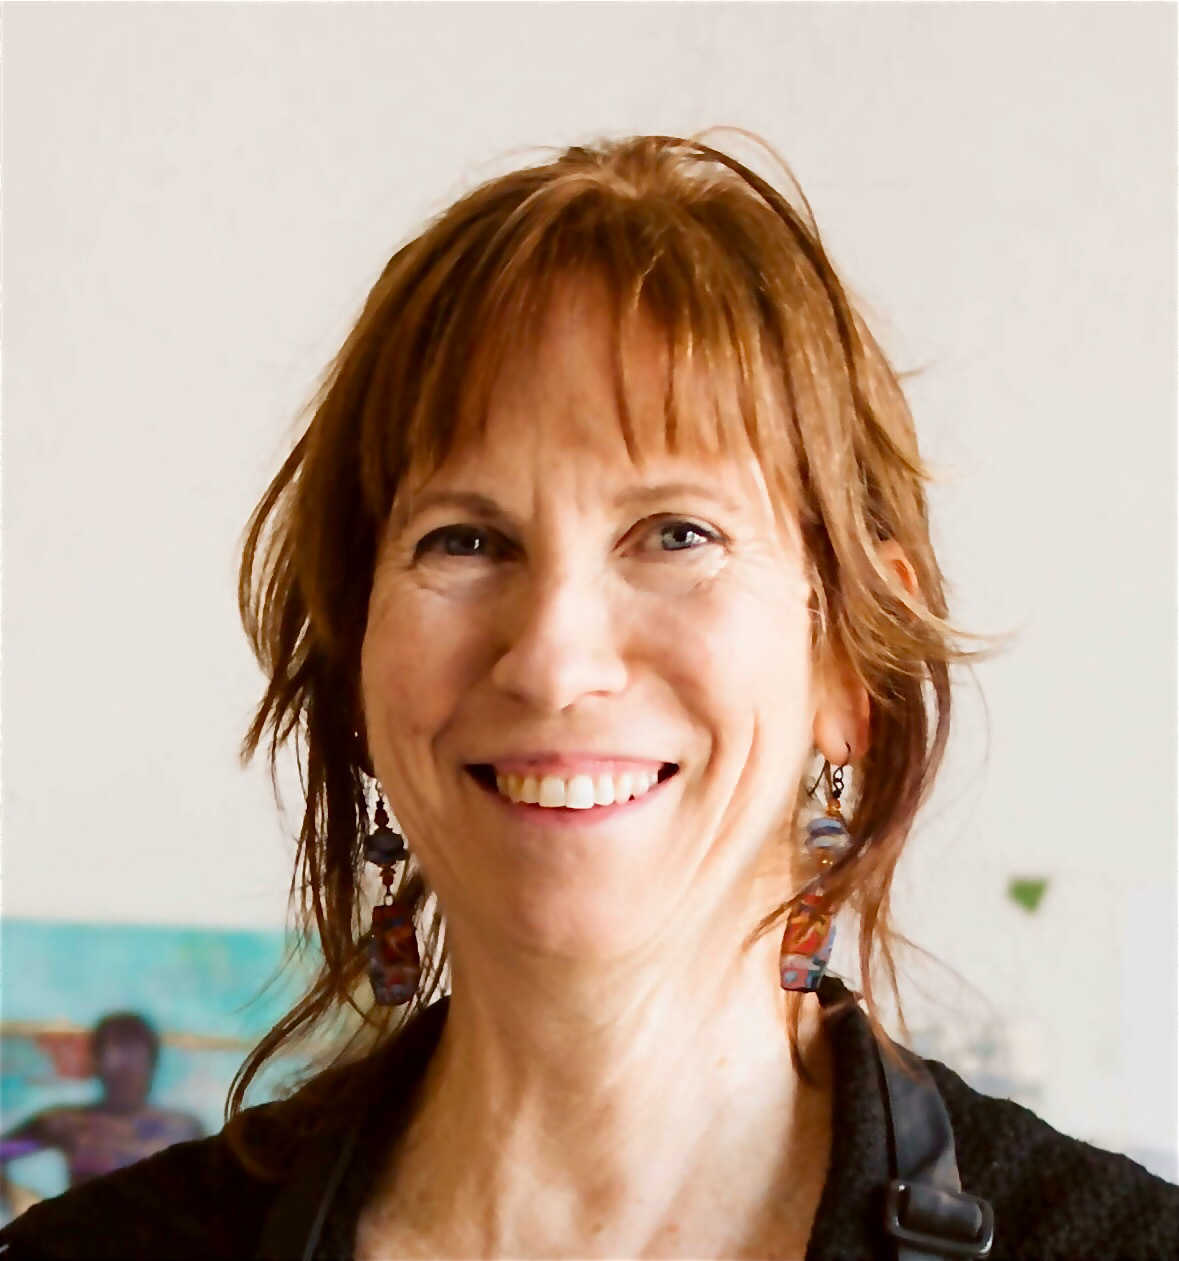
Before I hand the blog over to Alex Louisa for her to tell you all about working with PanPastels, here’s a wee bit about her:
Alex Louisa Bio
Australian artist Alex Louisa graduated with a degree in Journalism and Creative Writing before the need to create firmly pulled her attention back to her art. Having worked as a graphic artist for eight years, she now focuses solely on her personal work.
Alex has been exhibiting within Australia since 2007, and internationally since 2012. She works with PanPastel and charcoal, as well as with oils and acrylics. Her work focuses on elements of the natural world that grab her attention, for instance, the intricacies of a leaf or flower or an animal’s individual personality, especially those of the avian kind.
You can see more work on her website.
And now, here’s Alex Louisa!!
~~~~~~
Before I discovered PanPastels, I’d always used coloured pencils. The way I worked involved a lot of burnishing on hard surfaces with a truly awful pencil hold so I was getting a lot of pain in my hand and my fingertips were going numb! Initially, the numbness only lasted a few minutes after each session. When this progressed to a few days at a time, I had to consider alternatives. Despite all efforts, I just couldn’t seem to train myself to adjust my pencil hold. I was starting to get into oil painting at this stage but was also thinking about my soft pastels, which had been untouched for many years. Looking online to see what pastels were available and taking any excuse to buy more art materials, I discovered PanPastels.

PanPastels are a genius invention of compressed soft pastels in pan form. They come in a gorgeous palette of 80 main colours, with additional special-effect pans including metallic colours, pearl mediums, and even a colourless blender. They are professional artists’ quality soft pastels, which are easily mixed together to create any kind of colour, and while they can be used on their own, they also work beautifully with regular soft pastels, pastel pencils, or coloured pencils. (A lot of people use them as a super-efficient initial block-in, then further refine their piece with other materials.) An interesting point is that each pan yields at least 4 times more coverage than a single pastel stick. I also find they create a lot less dust than pastel sticks.
You apply PanPastels with specifically designed sponge tools, called Sofft tools. These tools are available either in a palette knife style, which includes blue plastic “knives” with different shaped ends and interchangeable sponge tips, or shaped sponges in varying shapes and sizes. When I’ve taught PanPastel workshops in the past, I’ve found that people tend to gravitate towards certain style tools, depending on how they like to work, and which tool feels most comfortable in their hand.

I now almost exclusively use a Sofft Tool called the Sponge Bar – Point. I feel like it was designed just for me! I find that working with an angled sponge for PanPastels (and an angled brush for oil paints) is far easier on my wrist which I broke in the past and which tends to play up these days if I’m not careful.
I first tried PanPastels in early 2011 and they actually didn’t do a whole lot for me. I think this is where a lot of people tend to trip up with the medium – they try them once on one kind of paper, and when they stumble a bit with the process they don’t keep going. At least this is how it was for me initially, though I wish I hadn’t been deterred at the time.
To begin with, I only had a few pans of browns and greys, plus black and white. They were something I bought on a whim as I love to try any art materials that are new to me. I used them to block in the larger pastel areas on my “Still” piece, and I thought this was pretty much all I’d use them for.

In this piece, I blocked in the white of the bird’s chest with the PanPastels. I really liked how easy it was to create a soft-focus effect with the Sofft Knives. I added the detail in the wing feathers first with charcoal pencils and pastel pencils. I then used the PanPastels to “glaze” in the darker brows and shadows over the top, without disrupting the pencil marks. In other areas, I blocked in a suggestion of the bird’s body feathers, then used an eraser to lift out some softer feathery details here and there.
The PanPastels definitely saved time for large areas compared to regular soft pastels, but it didn’t cross my mind that they’d be any good for detail work. At this point, I was also frustrated with how the sponges seemed to agitate the surface of the BFK Rives paper I was working. The fibres in the paper were being stirred up which meant further layers of pastel pencil were more challenging than they needed to be!

I didn’t try them out again for a little over a year. I did become a mum to twin boys in this time, so there was naturally a break in my art-making for a time! By now, I’d discovered sanded pastel paper and had grabbed a couple of sheets to try. I also tried out one of the pointed sponge tools with my PanPastels for the first time. From the first stroke with this paper and tool combination, I was in love. I remember I did one wiggly line with the white PanPastel on a piece of dark grey sanded paper, and it looked like a wispy cloud.
That night I created my first three greyscale PanPastel landscapes and adored the entire process. It all went so much more smoothly than my first attempt with the medium, and I immediately bought the full set of colours, along with more of my now-favourite Sponge Bar Point Sofft tools.

I spent a lot of time testing out different papers, and the different mark-making effects I could get just with this one sponge. (In photos people often think I’m holding an eraser!) I felt like I was painting, and this is what’s really special about this medium. You are applying the colour with a tool, so I feel more like I’m painting – almost like I’m using dry paint. (This was especially helpful in my early years as a mum – I didn’t have to worry about my paint palette or brushes drying when my boys woke from their naps. I could just put down tools and go!)

There’s something to be said about the thought that’s gone into making such an incredibly well-organised product. The sets come in palette trays, and you can rearrange them however you wish – the pans simply click in and out of each space. It’s also helpful that the trays come with a lid for easy transportation, or you can choose to stack and screw the pans together, so you only need an individual pan lid on the top. This is super convenient for travelling with the colours. I also really appreciate how the colours themselves have been organised. With the exception of some extra neutral greys, each colour is grouped in lots of four which includes the main colour as well as an Extra Dark version, a Shade, and a Tint for each colour.
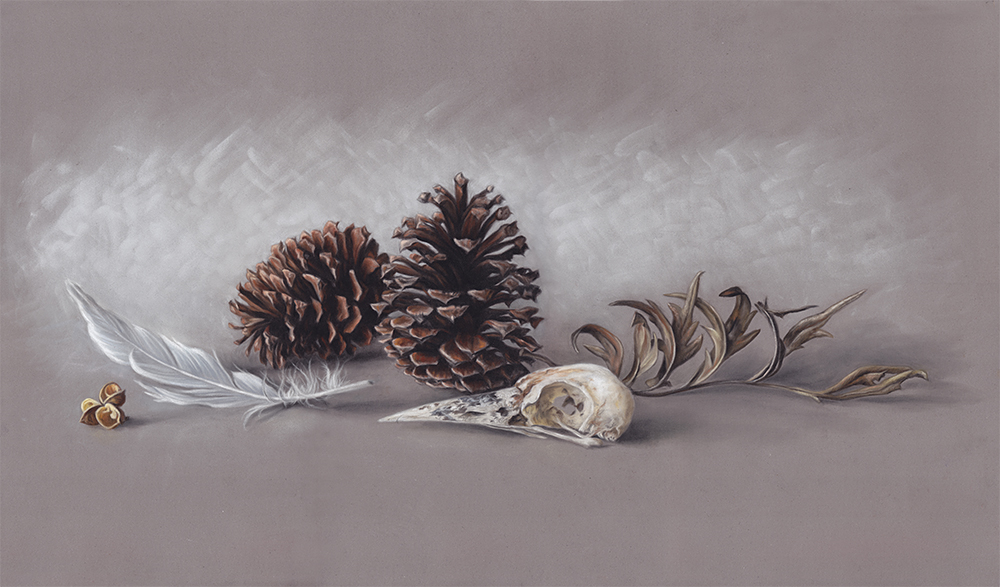
I don’t know how many PanPastel pieces I’ve created now, but it’s been dozens since those first few landscapes. So much of my work involves birds or other wildlife, or still life arrangements featuring pieces from my vast collection of treasures I’ve collected from the natural world. The medium lends itself really well to the textures needed for such artworks.

I can use the edge of the sponge to create smooth lines of a feather or other fine detail marks, or I can load plenty of pigment onto the sponge tip to dab in extra highlights or shadows. Moving the sponge in rough cross-hatched marks creates the variations for landscapes or the surface of leaves. I even save my older sponges when the edges get more worn and uneven, as they create wonderfully textured, varied marks which always have a place with my natural subjects.

I am most often asked about how I get so much detail in my work when I’m only applying the colour with a sponge. It’s easy to get a thin line if you use the edge of a new sponge, just like you’d use the edge of your paintbrush to create a thin line of paint. Though it’s easy to wipe your sponge on a piece of paper towel to clean it and switch to another colour, I treat my pointed sponge as if it has 4 different zones. On one side, one end is for highlights, and the other end is for the darkest colours. The flip side is used for two mid colours.
On the following Protea piece I used three sponges in this way – one for the pinks in the flower, one for the greens and other colours of the leaves, and one which sits in my collection to just be used for backgrounds of whites and pale greys, since they tend to feature in my work a lot.


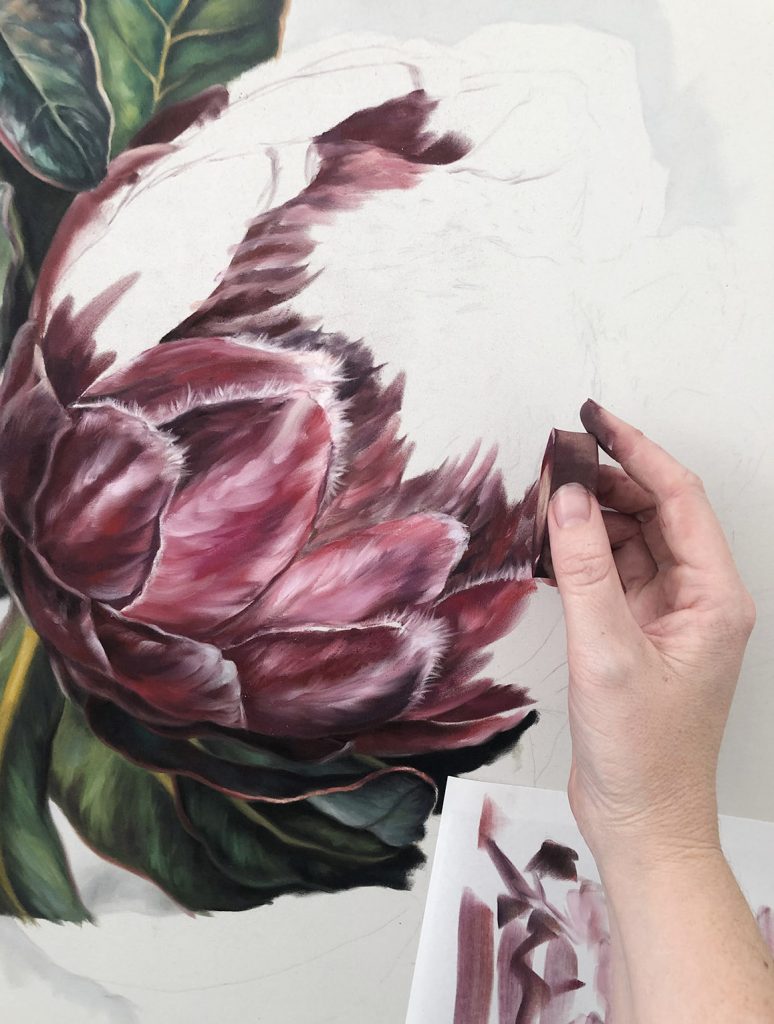


My favourite papers for coloured PanPastel work is Pastelmat by Clairefontaine or Colourfix by Art Spectrum. For my Protea piece, I was working on a light grey sheet of Pastelmat. Since this surface doesn’t hold up well to erasing, I start with a light transfer of my drawing to be sure I have everything in the right place. For coloured work, I tend to work in quite calculated, opaque strokes, rather than building up transparent layers. Thanks to the Pastelmat surface, I can still layer further colours on top if need be.

I love to load the sponge up with multiple colours, just as you would with paint on a paintbrush, to create a more interesting stroke. I generally work across the piece from left to right so I’m not smudging things with the edge of my hand. I blend the colours into each other to create soft edges – it makes me think of blending wet into wet with oil paint – or I use the edge of the sponge to create sharp edges. I mix my colours right on the surface of the paper, and an eraser never comes anywhere near the piece.

On the flip side, I love to work on other pieces with only the black PanPastel. In this case, I tend to rely heavily on an eraser for detailing. Subtractive techniques work much better on a smooth, uncoated paper, and I use a kneaded eraser to subtly knock back certain areas that end up too dark. I’ll use the sharp edge of a hard eraser to carve tiny details into the black, like the feathers in my raptor portraits. This is another process that I really enjoy, and I tend to jump back and forth between working on coated papers if I feel like working with colour, or smooth papers if I feel like just working with the black.
For now, I can’t wait to work on much larger PanPastel works. Each time I create a large piece I just want to take the scale up again, so it’s time to tack some huge sheets of paper to my studio wall and get started on those! I never tire of creating my bird artworks, but I’m also feeling pulled to create more landscape and still life pieces too.


The most important point I can make when it comes to using PanPastels is to just experiment as much as you can. Test them on every paper surface you can get your hands on – smooth or rough paper, sanded or coated paper, printmaking paper, watercolour paper – all of it. Try out some pastel grounds or work over gesso. PanPastels react very differently depending on the surface you’re working on. Through trial and error, you’re bound to find a combination which delights you and which you will want to explore further.

Mix them with other media. Use them with stencils. Try soft delicate layers and strong bold marks. Test out subtractive techniques. Challenge yourself to get as many different strokes and marks out of each sponge tool as you can. They are so incredibly versatile, and I feel like I’m still discovering new ways to use them even though I’ve been creating PanPastel works for years now! I do love my oil paint too, but PanPastels are absolutely my favourite medium to work with as well.

*****
Wow!! That was way more information than I expected when I asked Alex to guest post.
Was that useful? Do you have any questions? Do let us know by leaving a comment.
Until next time,
~ Gail












60 thoughts on “Alex Louisa – Nature In PanPastels”
What a fantastic article! Thank you so much for this. I have been wanting to try Panpastels for some time now but really needed this clear and detailed article with all the wonderful illustrations to finally make up my mind to purchase some and give it a try. Thank you Gail and Alex for this excellent article. I would love to see more about this interesting medium.
So glad to hear you found Alex’s article useful Susan! Let us know how it goes.
And I’ll keep your request in mind.
Thanks Gail for asking Alex Louisa to blog about her techniques with PanPastel. I found it very informative and it has fired me up to get out my PanPastels and have a go. Thank you to Alex for sharing her knowledge. I was pleased to know that she is Australian and will certainly be following her in the future.
You are so welcome Diane! Now go get out those PanPastels 😀
At last a guide for my forlorn PanPastels. I now will eagerly take them up again and practice practice practice.
Thanks for a clear and well thought out lesson. Your paintings are beautiful!
Kathleen it’s great to hear Alex’s post has inspired you to reconnect with your PanPastels!
I enjoyed this article so much. I am now tempted to buy some Pans to try.
Karen, I know what you mean about being tempted!!
Wonderful!
Whoo hoo!!
Fantastic article! Of all the information I’ve read on Pan pastel and watched on YouTube videos, this is by far the best and most helpful!
Thank you Alex Louisa for sharing your experience and talent in PanPastels.
Your pieces are remarkable!
Tracy how wonderful to hear this! When I reached out to Alex, it was my hope that she would share her knowledge about PanPastels. She surpassed my expectation and I’m delighted there’s been such positive response to her post!
That was super helpful, thank you to you both!
Judy so good to hear that!!
I have just started experimenting with Pans, and this article was a gift from heaven!
That makes me very happy to hear Therese!! I’m sure Alex will think so too 😁
Thank you for this great blog on PanPastels! I recently finished a painting of crows using quite a bit of the eight colors I have, and have just received 20 more that I ordered with all the sponges and knives. This is so timely and helpful as I’m getting ready to start another project! Thank you Alex Louisa and Gail!
I just LOVE perfect timing Anita! How wonderful that this article comes just as your new PanPastels arrived. 😁
Thank you so very much for your blog post. It’s very informative and has inspired me to check out working with pan pastels. Your art is absolutely gorgeous. Thank you for your time, talent and sharing.
Muriel I’m happy to know Alex’s post has inspired you to try PanPastels!!
What an inspiration this article is. So far I had only used white and black pan pastels, along with charcoal to draw portraits, as demonstrated by Brooke Walker, an Australian artist. Those 80 panpastels have now been added to my Xmas wish list!
Ohhhhh I can see how inspired you are by this post Ute!! How wonderful! Let us know if Santa arrives with all 80 colours 😁
Really interesting, thank you very much! So inspiring, I have a few colours in pan, but have not tried them yet.
Now I feel the hehe to start right away 😊
Jytte glad to hear you’re inspired to try your PanPastels!! Hope you follow your urge to get them out 😊
Thank you Gail. I love Alex’s work, especially as I mostly paint wildlife and companion animals.I recently started using Pan Pastels and agree with Alex that the sponges are the best tools. The pans are quite expensive to buy, but I treat myself to a few every time I sell a commission. Her attention to detail is amazing, it is spurring me on to use my pans for more than just using for backgrounds and underlayers.
So glad Alex’s post will push you to explore Pans beyond how you’ve used them so far! Thank you for sharing your own experience with them and also how you add to your collection.
Thank you for this wonderful, informative blog of such a talented artist! Must explore this medium soon. She has completely inspired me…
Whoop whoop!! Fantastic to hear. Come back and let us know once you try them.
Amazing artwork and a wonderful explanation of the different ways pan pastels can be used creatively. Thank you so much for this!
You are so welcome Christine! I too loved reading and seeing how PanPastels can be used. Alex certainly knows how to put them to good use!
Just got some PanPastels recently and have been loving them! I’ve used them for everything except the small detail work but I will have to give it a go. Many thanks to Alex for sharing her creative process and lovely works. Thanks Gail!
Kat that’s awesome that you are already using PanPastels so extensively. Also awesome that Alex’s article has inspired you to go even further!
I’ve had a set of pan pastels since they first came out – but was kinda baffled and unsure to the point that I never even opened them. Now I am inspired to try! Thanks to you both for the info and encouragement. I can’t wait to start experimenting!
Carol I know exactly what you mean!! I too have a few Pans from those early days and they are around my studio somewhere. I too am inspired to open those suckers up and give them a go!!
Come back and let us know how it goes 😁
I have already purchased a set of pan pastels and started experimenting with them but have been wishing for more conversation about and instruction for how to use them. So I was ready for and very appreciative of Alex’s article. Thanks for sharing it with us.
Marianne, sounds like Alex’s article has come at a perfect time in your PanPastel explorations! I’m glad it’s so helpful. 😊
Fabulous, amazing and beautiful work! Love the homage to dead birds. Great blog, again.
Agreed Marsha!! And it was the dead bird images that drew me to Alex as an artist and then when I found she used PanPastels, as a guest.
Wow!! What an eye opener…..! Absolutely knocked out by Alex’s work…..the softness and the airbrush quality is amazing! And I would never have though you could get such sharp, crisp lines with a sponge! Very inspiring….I think a set of PanPastels may be in my future….
Curt, love your enthusiastic and surprised response. I felt that way myself when I first saw Alex’s work! I hope you’ll come back and let us know if PanPastels find themselves as part of your pastel life!
I have tried the pan pastels in the past, and now am interested in a return visit. Alex Louisa is very clear on her methods and shows the beautiful results of her creative Art. Thanks for sharing the love of this medium
and inspiring me to create with pastels again!
Gail, I enjoy your emails and the many artists you feature…they truly inspire! It’s a pleasure to have so much information at hand when a quick review of ‘how to’ is needed!
Thanks so much Esther! I’m always delighted when a guest blogger receives so much positive response. I’m happy to hear Alex’s post has inspired you to give your PanPastels a go again!
Thanks for the great article, Gail. I have an on-again/off-again relationships with Panpastels, but the article makes me want to get into using them more. Especially since, like Alex Louisa, I paint wildlife. The way she uses subtractive techniques is very interesting.
Yay Susan!! I’ll be interested to know if you start using and perhaps incorporating PanPastels in your work. And yes, I too was fascinated by how Alex uses the subtractive technique in her work.
This was sooo informative. Thank you. I really never knew pan pastels could do what you have done. It was a complete surprise. Your work is beautiful and I appreciate your sharing.
I’m smiling as I read your comment Anne mostly because I totally relate to it!
This was such an informative article. I’ve learned so much about pan pastels! Your art work is mesmerizing!.
Glad you enjoyed it Helen.
I too learnt so much about this type of pastel medium, one I knew so little about.
I’ve been wondering about pan pastels for a long time, and Alex’s explanation of how they work and her experience with them has really piqued my interest. The fact that you can mix them to make colors is very tempting in contrast to soft pastel sticks where sometimes it feels like you never have exactly the right color. I hate to start anew with a new medium, but I will have to try a small set and see what happens. Thank you Gail and Alex for a very interesting and informative post.
I’m glad your curiosity has been piqued by Alex’s post Ruth. And yes, I hear you about diving into the learning of a new medium. But nothing tried nothing gained and you never know what may come of it! I look forward to hearing what you think PanPastels once you try them!
Such a talented artist. Beautiful work and Very exciting to understand the technique used to create these beauties. Thank you both so much. Gail you are just the best bringing us all this information from so many talented people. You are appreciated thank you!
Nancy thank you for your very kind words! So glad you enjoyed this post by Alex.
This is fantastic! I have long wanted to experiment with pan pastels. One question for Gail: when admission to a show (such as Pastel Society of Colorado or IAPS) says “soft pastel only”, are pan pastel works admissible? I can contact my PSC myself, but I wondered about national shows. In any case, I love this posting. Many thanks for all of us duffers.
Yay!! To answer your question Andrea, I don’t know absolutely but I would say yes. But best to check.
About a year ago I gave away the few that I had because I never got used to using them. Now I wish I had them back! I am inspired to try them again at some point.
Argh, isn’t that just the way Wendy!! Well at least now you have a resource if you ever decided to pick up some to try.
I am almost speechless, other than, WOW!
I hear yay Kerry! WOW indeed!!!
Amazing information! I’ve fallen in love with pans over the last year or so, but so much here that I haven’t even thought of! Thank you so much!
Ohhhh that is so good to hear Barbara. You are right – Alex certainly reveals many ways to use Pan Pastels beyond the obvious!