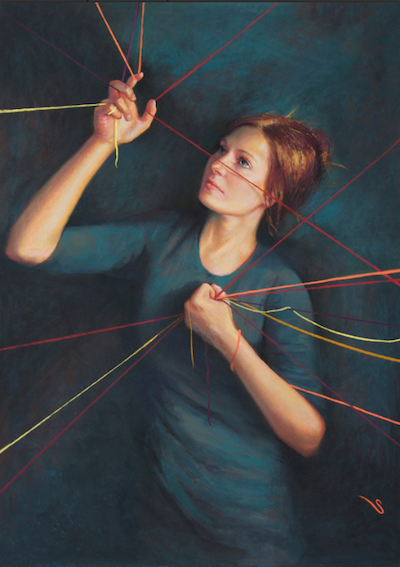
I’ve followed this artist since I first saw her work quite a few years ago. I wrote about one of her pieces in a very early blog post. Since then I’ve admired her work, applauding her awards, received one after another. Happily she agreed to a wee interview when I was IAPS. The artist? Christine Swann. Christine brings a vitality of light and colour to her portraits. Don’t know her work? Here’s a taster!
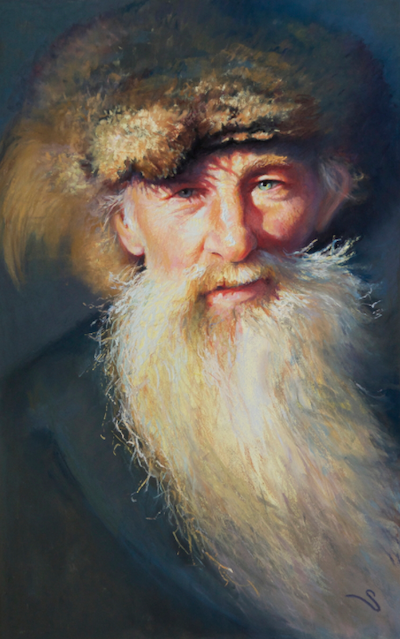
I, of course, was so happy when Christine agreed to contribute a guest post to HowToPastel. And on reading her draft, I was delighted to see the Christine Swann humour I’ve come to know and love that lies beneath her wisdom as a teacher.
Before I hand the blog over to Christine, first something about her…
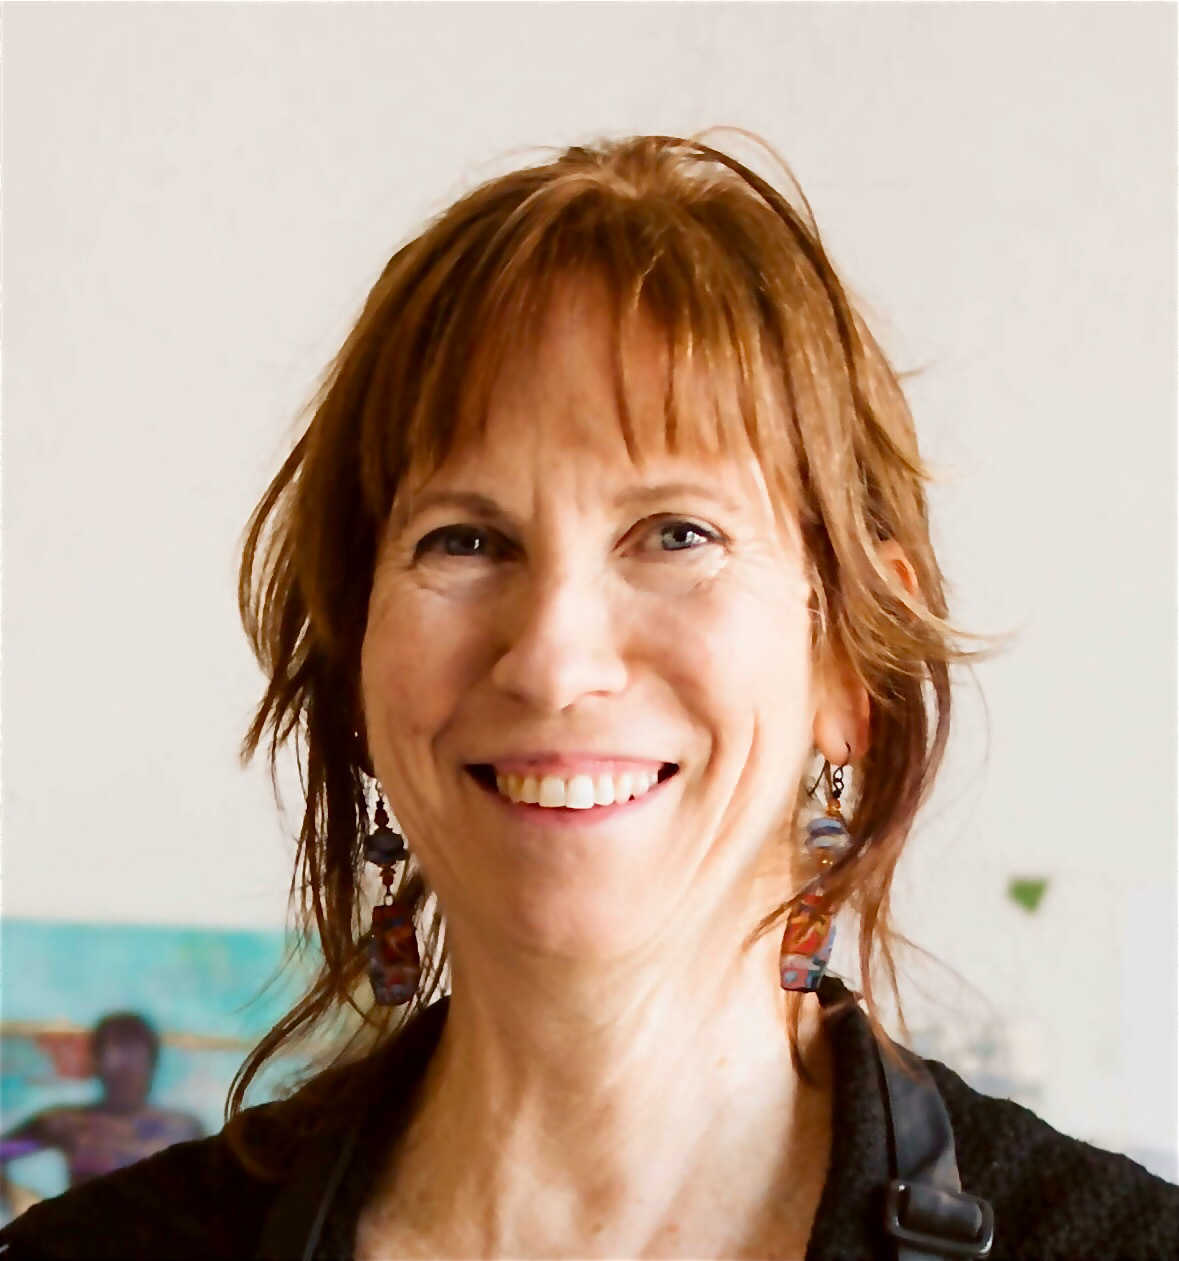
Christine Swann Bio
Southwest Art Magazine selected Christine Swann as an “Artist To Watch” in the June 2015 issue of the magazine. Known for her “personality portraits” she started as an illustrator and is now an award-winning artist on the international level including her win of the 2015 Best of Show “Prix de Pastel” Masters Circle Exhibition award at the IAPS (International Association of Pastel Societies) Convention.
Christine is a Signature Member of the Pastel Society of America, and a member of the IAPS Masters’ Circle. She is currently the President of the Pittsburgh Pastel Artists League. She currently teaches the “Power of Pastel” Workshop to groups around the country. You can read more and check out her work on her website. (When there, check out her fabulous first YouTube video on burning her work. Yup, you heard me. Go check out what it’s all about!)
And now, here’s Christine Swann!!
~~~~~
Artists ask me all the time about how to get the “right” skintones when painting a portrait. It is such a complex question because there are no absolute answers when it comes to color.
Let’s take the color pink. “Pink” is just a name for a broad category of colors. There are literally millions of versions of what we can call “pink”.

In the photo above I have some nice pink pastel sticks selected. These happen to be Schmincke, but the brand really doesn’t matter. Artists are ready to pull sticks like these out when painting a portrait when the model has caucasian skin. For this demonstration, I will use my own arm. So which of the colors above would be the best fit for a good “skin” color?
Here is my arm and the same sticks from above on the side. Which sticks would be a good place to start using to render my arm ( if you are going for realism that is)?

So let’s see what they look like right on my skin….. These are the exact same sticks from the top photo above and I marked all of them on my arm like so…

If you guessed that none of them is a good fit……..then you would be right! None are a close approximation to my skin tone. They are all too acidic or too “chalky” (meaning too much white in the color itself) and the ones with more color are too “high chroma” (a good term to know).
But if I take these sticks below, which I tried to keep under the “pink family” as much as possible, guess what happens? The first photo has them sitting on a black background and then on white background…..yes, these are the exact same sticks…….cool how they get lighter or darker based on what they are sitting on, yes? But I digress……..
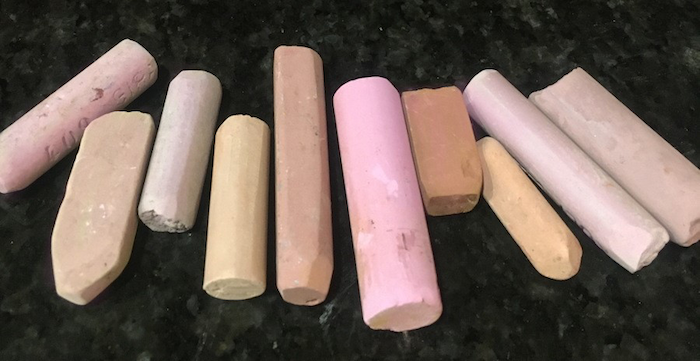
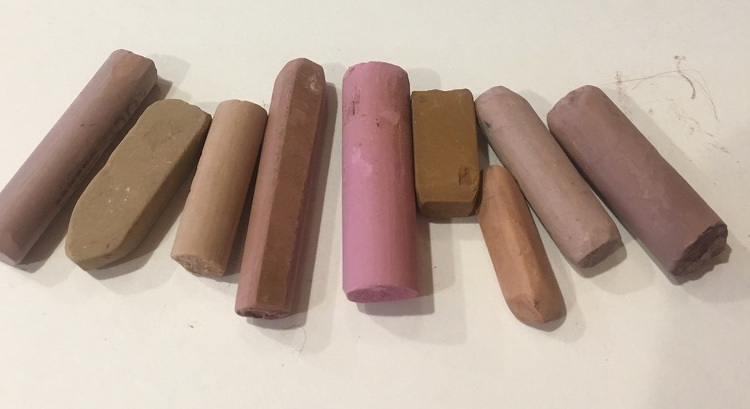
These more apparently yucky, dirty, “neutralized” pink sticks look like this on my arm….. each mark is lined up across from the stick…..
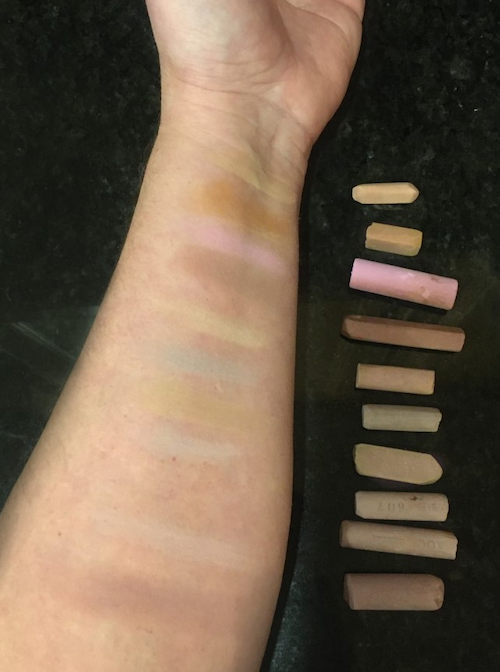
Yeah, now we are talking…..the sticks are darker and have less “color” in them. They are desaturated and therefore Low Chroma. So now they match up better. Otherwise, there is the risk of painting portraits that look like the models are made of plastic. Think Barbie. A few of the colors above now have an apparent greenish or blue cast to them seen up against my arm. They changed in appearance based on being up against my skin. Color is relative and it is a wonderful trick of nature that color changes depending on what is around it so we have to be prepared to keep up!
And important to note – I tried as hard as I could to “match” my skin tone here. I have thousands of colors at my disposal. (Yes, I have a lot of pastels). And guess what? They meld in, but none are really “exact” to my skin tone. So there is no “right” color! Skin is too complex! There is only our approximation of what we are seeing and representing. So for me, a variety of colors is needed to meld and blend into each other to create something approximating life-like skin.
Which brings me to my main point: A portrait built only on “skin tones” is like plain cream of wheat. In a white bowl. On a white placemat. Boring.

So that is why I always start out not trying to match skin tones but rather by asking myself, “What is important in this portrait?” Setting up clear intentions to guide the painting will help me set the tone for a piece and then I can worry about how accurate I need to be in my skin tones later on. Color can represent what I want to say.
For example, this is a demo I did recently in my portrait class. After setting up the drawing, I start to look for areas to “push” the colors.
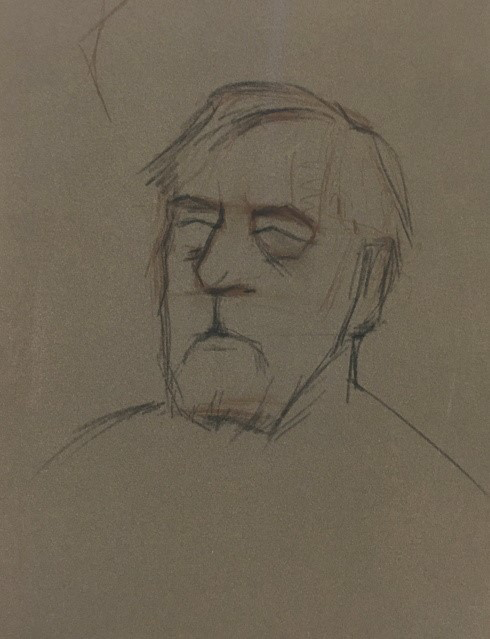

So in this demo, he looked like this when I started to think about color…..yup. No “right” color here! Only interpretation and freedom. Cool areas? How about some violets? Warm areas? Am I seeing oranges and lavender? And I ask myself: Can I exaggerate that? Sometimes to the point of ludicrousness and you know what? That’s ok. Because now I have a crazy interpretive base and yay! No struggle for the right color. I am free to do whatever I want as long as I follow the values of the form. I am then free to reign the colors back into something more realistic. Why do I do this?
On the left is a basic “flesh-toned” stick. It is actually one of the ones from above. By itself, it has a thick, plastic, “cream of wheat” feel to it. But look what happens when I drag it across cobalt, orange, or green. The color gets more energized. And yet neutralized. It talks to the colors underneath. Those tiny pastel particles sparkle against each other. Trust me, it is more apparent when you see this in person. ) Think of it like adding layers of stained glass on top of each other.

Plus, it is fun!

Eventually, he got layered up and he came out looking like this. That lavender and orange are still there. They are just singing softly in the background. They are supporting the main stars which are the colors sitting on top and still trying to represent the “real” color of the skin.
All of it is a representation.
So I hope this gives you permission to mix up your colors. Add berries and nuts and maple syrup to your cream of wheat. It is so much more fun, appealing, and better for you. Go with your gut and find out how colors can talk to each other. I promise you, your portraits will be more appetizing.
So forgive yourself! Try a color. Try another. Adjust a bit…adjust some more. Add a lavender. Add some green. Know it is ok to move back and forth with colors on a face just like in a landscape. And who knows? You may find that violet in the hair and that green on the face of a boy in a bathtub is the right color.

*****
Weeeellllll that was a colourful eye opener don’t you think?? I loved how Christine used her actual arm to show us how the pinks looked so crazily out of whack against her own skin tone.
Now we want to hear from YOU! Please leave a comment or question. Did you have an ‘aha’ moment? Do let us know 🙂
Until next time,
~ Gail












38 thoughts on “Christine Swann – Getting The ‘Right’ Skintone”
The depiction of the tension of the yarn in the right hand of the woman in the first painting – photographic!
Hi Liz, it’s quite extraordinary isn’t it? You can feel the tension as if pulling a bit harder and the whole thing would SNAP!
thanks!
Hi Gail – What a great article. The demo of the colours laid on Christine’s arm made the whole topic very clear. Her explanations made everything to do with skin colour make perfect sense. Thank you. The complete lock-down in place here in New Zealand gives the perfect excuse to get in the studio and experiment….!
So glad you found it illuminating Penny! It was an eye-opening illustration of how we read colour soooo incorrectly sometimes.
And yes, the lock-down gives many of us the opportunity to focus on our creative work. You go!!!
hi! thanks! get those neutralized colors out!
I love seeing how she uses colour underpaintings in her portraits- I like doing portraits myself so keen to try this and learn more – thank you for this Gail – perhaps a portrait fits the next ‘IGNITE!’ task?
Yes, Christine’s explanations on using a bolder underpainting tie in nicely with what we’ve been covering in the IGNITE! membership group. A portrait isn’t on the immediate horizon but it will come!!
(For those of you curious about the IGNITE! membership, I will be opening it up for a short window next week but only to those on the WAITLIST! So sign up SOON by clicking here. This isn’t a commitment to join. It just means you will have the opportunity to do so. I won’t be reopening it again until summer.
Very interesting Gail. I love the idea of layering! You introduced me to the layering method in IGNITE!. And yes, Christine does have a sense of humour! Thank you to both of you for this blog and info!
So glad you enjoyed Christine’s post Ed! And her delightful humour 😀
Thanks and you are welcome!
You are welcome!
Gail and Christine, thank you so much for this blog. Yes, I had a huge “aha” moment! And I just love love love Christine’s approach to painting her portraits! These paintings are masterpieces!! I wonder if she uses any pastel pencils for the details?
Take care and all the best in these crazy times,
Gabriela
Hi Gabriela, so good to hear you had a huge AHA moment! And I know Christine will love hearing that!
And yes, her paintings are masterpieces …so is it any surprise that she wins top awards???
Have you gone and watched the video I mentioned in her bio??? Go do so now!! It will help answer your question! (And I’m sure Christine will pop in and give you her own answer too :-D)
hi. I actually use pastel pencils for most of the painting EXCEPT the details. Pencils don’t have enough strength of color, so why use it in important details? Just have to be accurate with a larger stick.
Thanks Gail! Great post. Christine must be a fabulous workshop instructor. Beautiful portraits!
Yay Julie!! And yes, she must be!!
thanks guys! hope to work with you someday….we have a lot of fun in the workshops.
Thank you soooo much.
Great way to demonstrate the issue.
Love the narrative.
Very informative.
Thank you Gail and Christine
Hi David and you are welcome!
Yes,
yes,
and yes – totally agree with you!
You are welcome!
As I enjoy working on portraits; this blog is the greatest. It is definitely a keeper. I had never thought about the importance of layering for the final results. Will try and keep this in mind and practice the layering on a separate paper first in order to get the feel of doing this.
Oh yeah baby!! Get to that layering!! I LOVE Christine’s demo of this.
As you know, I am a BIG believer in layering and using bold colours at the start of a piece but I haven’t illustrated it much with portraits. So I’m DELIGHTED that Christine’s post has illuminated the lightbulb for you. I know Christine will be happy!
Love that this is a keeper article!
hi. that is a good idea. practice does help and there is no right or wrong way to do it, typically pencils layer best under the heavier sticks. Have fun!
That is a good idea. practice does help and there is no right or wrong way to do it, typically pencils layer best under the heavier sticks. Have fun!
I have a blog post every Wednesday on pastel. Hope you can check it out….
Thank you so much for that! I have had a hard time trying to understand why green (in particular) and blue and other bright or dark colors were used in portraits. Thank you for the aha moment. With the layering it makes perfect sense. It was a lovely post and demo, Christine; I learned a lot. And Gail, thanks for inviting such a helpful teacher.
LOVE that you had an aha moment Wendy!! Thanks for letting us know 🙂
Loved the skin tones presentation! The explanation of chroma, tones, and effects of layering certainly gave me a reinforcing shot in doing portraiture for sure!! My reinforced “aha” moment…thanks for the memory boost!!
Shirley I smiled at your comment! It’s funny how we can know something but sort of forget it or just don’t do it and then boom! something comes along to remind us. Thanks for sharing your “aha,” reinforced as it is, with us! 😀
I am still “afraid” of doing portraits, although I give it a try every now and then. I enjoyed Christine’s friendly humor as well as her explanation of her technique. The pastels marked on her arm was quite eye-opening. Loved seeing Christine’s portraits. They are fabulous!!! Her layering technique ties in perfectly with your layering color lesson in IGNITE! (Gail’s membership). Looking forward to your lesson on portraits, Gail!! 🙂
Glad it was such an eyeopener for you Ruth! Maybe Christine’s wisdom will encourage you to give portraits a more frequent go 🙂
And hmmm….is that a hint about the lesson on portraits? Hah hah
Amazing! I tried Christine‘s recommendation and got results on totally different level! Thank you, it‘s easy to understand, easy to implement and the result is brilliant!
Ekaterina, that’s AWESOME!!! Christine will LOVE hearing that! 😀
I would love to see some tutorials on doing black skinned people. I always struggle with getting the right colors/shades.
Hi Carol – thanks for this request. Maybe, Christine, you can shed some light on this?
Wow I have struggled so much and feel like I’m going back to portraits. Soooo pleased I read this and yes I agree with Carol I’d love to see something on dark skin I’m sure there is a better way than how I struggle. Thank you so much Gail for posting this❣️
I’m, soooo happy to know this was useful AND inspirational to you Alannah!!
You may find Michele Ashby’s post useful regarding painting dark skin.