Recently, in my neck of the woods, we were treated to a lot of snow! Many artists took the opportunity to create snow paintings and a couple of those people asked me how I use colour under white, specifically under snow. So I made a small quick pastel sketch to show you how I ‘push’ the colours in an underpainting. You’ll see how I use saturated colour under white pastel.
This small piece is created from imagination, or rather, it was inspired by something I ‘saw on the wall’. (Read a recent blog for an explanation of what I mean by this.) It’s a very light scene – very high key – but I still used rich colour under white colours.
And by the way, although the colours I used are all up in the light end of the value scale, you’ll still see clearly designated light, middle, and dark values in
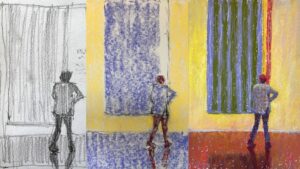
Check out the very quick thumbnail:

You can see the predominant value is light. There’s some middle value but only a soupçon of dark (the horizontal line and the short vertical lines close to it).
I drew up the piece quickly and simply on UART 320 grade paper.

From there I jump right into colour! This is an overcast scene but still, in preparation, I use lots of colour under white. The thing is, if I use a light touch and don’t fill up the paper’s tooth immediately, I can always and easily de-intensify the colour if it’s too colourful!
For the main light area, I chose warmer pink for the front and the cooler pink for the middle distance. I chose warm colours for the underpainting so that they will glow through the cooler light colours that will represent snow. The main thing is that I use colour in the correct value. So in the light area, colour, no matter how bright, is still a light value.
Have a look at what I mean:


I then began adding a light blue over the foreground colours. You can also see I played around with adding a creamy yellow. Let’s see what happens to that! I’ve also added more texture and layers to the background trees.

I continued to layer over the foreground colours but then found I had lost some of the luscious colour. And here’s the great thing about pastels, I began layering more colour over top of the cooler coloured pastel (you can see this on the right side). So even though I used warm saturated colour under white, I can also add more colour on top of the white. It’s kind of a push/pull thing happening.


I applied more cool light colours and then injected a bit more warm colour on top. I’ve also added layers to the mid-value area lower left. I wasn’t quite sure what to do with that foreground spot. In the end, I decided to try some dry grasses sticking up through the snow. I used the same yellowy brown colour from the background trees.

Once I got this far, again I felt I needed to oomph up the colour. Since I wanted to create a circular path for the viewer I intentionally placed different warm colours on either side of the painting. I hoped this would guide your eye around the piece. And that was it! A wee colour sketch to show how I use colour under white.

I did use quite a few colours for this piece! You’ll see how not-dark my darkest colour (used for the horizontal strip) actually is. So even though it acts as a dark value within the painting, relative to the bigger scheme of things, the colour itself is a mid-value.


What do you think about using colour under white? Do you use this method? If not, will you try this idea out? Remember, use a light touch and you can layer and layer so if the colour under white seems too bright or colourful, just cover it up!!
I look forward to hearing from you so please leave a comment!!
Until next time,
~ Gail












22 thoughts on “How I Use Colour Under White”
Hey Gail, yes the snow has been somewhat inspiring these past few weeks (it can go now, tho!😉). I agree that the use of colours ,(not so much what you see there, but what you “sense or feel” in the snow.) captures it! I’ve been using pinks, yellows, blues and purples…no grays..I see the gray, but it doesn’t read “snow”. Who knew how many colours you would need to paint white! 😂
I’m with you Teri, the snow can go now 🙂 And yay to your colour usage!!! Endless possibilities…
Wow Gail look at that! How clever…
So happy the Tuscany workshop is going ahead!
Oh, how I wish I could go!!! 🙂
Hah hah thanks Cheryl!!
And yes, I am thrilled about going to teach in Tuscany. I wish you could go too! One of these days….
Thank you Gail, I was looking for ideas for the snow, and now, I’ve got some! Hoping to do some sketches this weekend.
That’s awesome Louise!! Now go do those sketches 😀
That was very interesting Gail! Just for fun I saved the picture of your pastels and looked at them in b/w. I didn’t see much of a value difference in them there, which surprised me, because I can definitely see the value differences in your painting. I also noticed how when you added the warmer colors on the sides, it did what you intended. I found my eyes jumping around the painting happily to get it all in. 🙂
Good for you Ruth!! The reason I didn’t include a photo of my pastels in black and white is I had the same problem i.e. they didn’t really show all that differently.
So happy to hear that the warm colours I put in did what they were intended to do 😀
I’m in the south and painting white camellias. I am using a lot of colors too but now will try pushing and pulling the white to show the shadows and get even more color in. I have been trying to not get muddy or totally lose my lights.
Ohhhhh white camellias sound beautiful Price!! Glad this post has given you even more to work with colourwise. Remember to try and keep colours consistent in their value for an area that is all a similar value (eg a light value). This helps prevent ‘mud’.
Really enjoyed your blog. I like the layering of the colours and will use it in the future.
I took a course with Jessica Masters recently after reading her guest blog on your site. She is a great teacher and very inspiring. Thanks.
That’s wonderful to hear Suzanne!
And happy to hear you had a really good experience with Jessica.
This is just what I needed. Thanks so much for sharing, Gail.
So glad to hear that John!
WOW!!! Gail – thank you for your step by step painting of snow! I love your use of colour in your rendition of snow. As always, your blog is informative and very helpful. I’ve taken a few photos of snow in the landscape last winter and these past few weeks but I have not yet tried to paint snow. You have inspired me to do so! I’m surprised by how dark your horizon line appears after looking at your pastel palette. It’s all in relation to the colour values next to this line (I suppose). This is helpful to keep in mind and to not always reach for those truly dark colours. Thank you again!
Fantastic to hear Paige – both that you love my colour use with snow and that you are going to try it out!
And YES, everything is relative. I too am surprised when I see the darkness of that line against the snow yet recall that the colour I used was in the middle values. Which just adds to the confusion of art-making 😀
I think it’s definitely worth experimenting with, as large areas of just white are limited in depth and interest. I’m off to dig out some pastels …
Love hearing that Kylia! Hope you found them easily and that you tried them out….
Not a single flake of snow here this winter in the Dordogne (SW France), but we have stunning acres and acres of golden sunflowers in the summer. How about coming here for a ‘yellow’ workshop next year?
Mary-Anne I would LOVE to teach a ‘yellow’ workshop in the Dordogne. Send me an email and let’s see how we can make it happen!!! Anyone else reading this interested??
I love the idea of using colour to create snow. The colour adds another dimension and “lift” to the painting. I’m going to do this next time I paint a snowy winter scene. Thanks Gail
Thanks Linda! Colour is such a fun way to spice things up. Remember, you can always tone things down if they get out of hand. The wonder of soft pastels 🙂